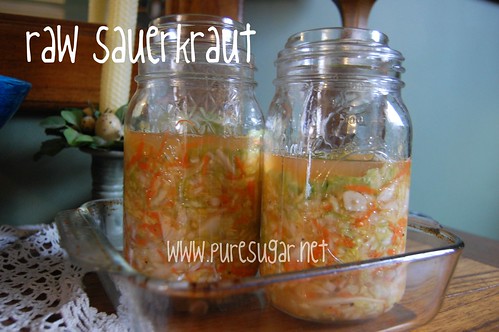
sauerkraut, take one

raw sauerkraut

A few years ago I started reading about the benefits of lacto-fermented food, but it all sounded so complicated and, honestly, a little strange to me. Leave jars out on the counter for days or weeks? Really? But as I’ve expanded my culinary skills and learned the arts of canning and pickling, I figured that fermenting had to be next.

I read Diane’s tutorial for raw, fermented sauerkraut on her blog Balanced Bites and realized that this was pretty easy. It just required a little babysitting. And as I thought about it, it dawned on me that my childhood was filled with this type of food. My Babci regularly made traditional Polish fermented pickles, and we ate homemade sauerkraut all the time. I had to get over my fear of bacteria. Seriously, people have been doing this for hundreds of years. It’s no big deal.

So I set about to shredding my cabbage and carrots, adding garlic and then the salt, and massaging the cruciferous veggies until they started to weep like little babies. I was amazed how much water came out! I kept saying to Drew, “Isn’t this so cool?” I don’t think he was as excited as I was, though.

I packed it in quart-sized Ball jars, covered the top of each with an outer cabbage leaf, then set a half-pint jelly jar filled with water on top of that to weigh everything down and keep the water level above the cabbage.

Then I put the jars in my dining room, covered them with a clean dish towel and waited. And waited. And waited. If you’re anything like me, you will become giddy with excitement when you see those little bubbles appear that let you know fermentation is happening! After a week and a half, I no longer saw bubbles. I think that it was too cold in the room to encourage the process, so I called it quits for this batch.

It is quite tasty, but definitely not there, if you know what I mean. But it goes great with my morning eggs! (Please forgive the horrible quality of this photo – morning light is not great in my kitchen and I wasn’t going to sacrifice hot eggs for a good shot, LOL!)

kraut & fried eggs

Next time around I think I’ll keep the jars on top of my fridge. I’ll also add the caraway seeds so I don’t get that sideways glance from my dad again. Anyway, don’t be afraid of fermenting food. If it’s going bad, you’ll know it. And the benefits of eating sauerkraut and other fermented foods are overwhelming! So give it a shot – you’ll be glad you did.

indian spiced chicken meatballs

indian spiced meatballs with savory tomato sauce

Earlier this week I finally had a chance to try Cinnamon, a new (well, new-ish) Indian restaurant in Rhinebeck. The food was delicious and I’ve had curries on my mind ever since. Yesterday I had some ground chicken in the fridge, and an idea in my head: meatballs simmered in a creamy sauce, infused with all of my favorite Indian spices.

If you use a food processor, this recipe comes together lightening-fast. And even if you chop everything by hand it shouldn’t take too much longer.

Indian-Spiced Chicken Meatballs
in Savory Tomato Sauce

Meatballs:
1 lb. ground chicken
1 med. onion
1-2 jalapenos, seeded
2 cloves garlic
1 tsp. cumin
1 tsp. chili powder
1 Tbsp. coriander powder
1/4 tsp. tumeric
1/2 tsp. salt

Coconut oil (or fat of choice)
1 Tbsp. cumin seeds

* Sauce:
1/2 cup plain yogurt
3/4 cup tomato sauce
1/2 Tbsp. garam masala
1/4 tsp. cayenne pepper
salt to taste

For the meatballs, combine onion, jalapenos, and garlic in a food processor and pulse until the vegetables are finely minced. Add the ground chicken and spices and process to combine. Shape into meatballs of your desired size. Melt coconut oil in a pan over med-high heat and add cumin seeds. Turn heat down to medium and let the seeds sizzle for just about 30 sec. – 1 min. until you can smell them. Add the meatballs to the pan

While meatballs are cooking, combine the tomato sauce, yogurt, garam masala, and cayenne in a bowl. Add salt to taste. (You can also add more yogurt or tomato sauce, adjust the spices, etc. The sauce is pretty forgiving.)

When meatballs are about halfway done, add the sauce to the pan and finish cooking until the chicken meatballs reach an internal temp. of 165 degrees F.

Garnish with cilantro.
Serving suggestion: cucumber and onion salad dressed with a squeeze of lemon juice; basamati rice (if you eat it) or riced cauliflower.

* PALEO OPTION
I realize that many people who follow a Paleo diet do not eat dairy. If that’s the case, my suggestion would be to add some fresh chopped tomatoes and extra onions to the coconut oil and cumin seeds, along with the garama masala and salt, allow it to cook down a bit, and then add your meatballs.

These meatballs were delicious, considering I threw them together at the last minute (since the kids ate all the taco meat I’d made!). I’m making another batch today for the freezer. I think this is a pretty versatile recipe that is easy to adapt to whatever diet you follow, whether it’s a standard diet, low-fat diet, low-carb diet, or Paleo. A little something for everyone 🙂

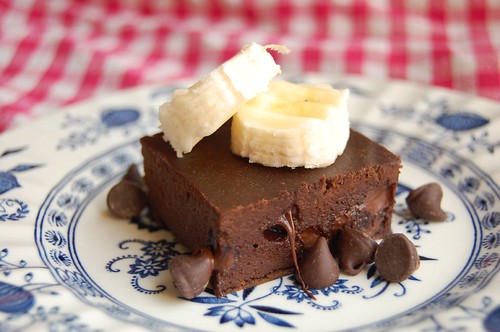
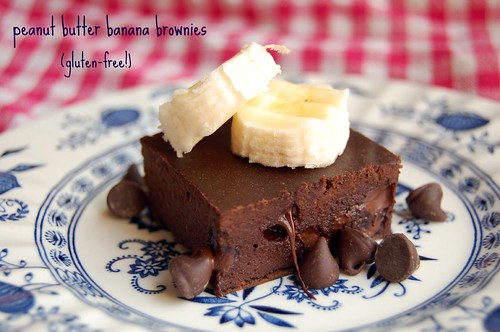
gluten-free peanut butter banana brownies

gluten-free peanut butter banana brownie

Last week I was craving something cakey. And chocolaty, but that goes without saying. Naturally, I headed over to Pinterest for a little inspiration and decided to try this Paleo mug cake recipe from The Wannabe Chef. It was delicious! Honestly, it was the first mug cake that I ever truly enjoyed. The only problem is that it was too much cake. So I set about to tweak it a little to my liking and to better feed a family of 5.

This recipe makes a standard-sized pan of gluten-free brownies. The best part? It doesn’t require any exotic specialty flours — I think most people have all these ingredients in their pantries right now! While you can certainly mix everything up by hand, I highly recommend using a food processor. It makes the batter silky smooth and as someone sensitive to texture, I think chunks of banana would ruin this recipe for me. (Just make sure you cover that opening with your hand because the cocoa powder flies everywhere!

Gluten-free Peanut Butter Banana Brownies

gluten-free peanut butter banana brownie
Ingredients:

3 medium bananas
3 large eggs
1/3 c. smooth peanut butter
6 Tbsp. cocoa powder
3 packets of stevia *
1/2 c. chocolate morsels *

Method:

Pre-heat oven to 350 degrees. Combine bananas, eggs, peanut butter, cocoa powder, and stevia in the bowl of a food processor. Combine until smooth (be sure to periodically scrape down the sides). Pour batter into a buttered 8×8 baking dish. Sprinkle chocolate chips over the top and gently mix them in. Bake for 30 minutes. Cool.

Yield: 16 servings

* These are both optional ingredients, but I like the extra sweetness they deliver. You could could use fewer chocolate morsels to cut down on the sugar.

As prepared here, there are about 97 calories per serving and 10.4 grams of carbs.

So there you have it! A delicious, guilt-free, grain-free, gluten-free, dairy-free (if you omit the chocolate morsels) treat that is chock-full of healthy fats and protein (and potassium). You can certainly substitute another nut butter for the peanut butter and I’m sure it would be just as good!

homemade banana chips

DSC_0067

For Christmas I gave Drew a food dehydrator. One of his favorite snacks is beef jerky, and he’s been talking about making it at home for a long time. I also thought it would be useful for preserving produce and herbs. (Go ahead – make the joke that this was really a gift for myself, I’ve already heard it!)

Anyway, I was really psyched to try this thing out, but didn’t want to go too crazy for my maiden voyage into the world of dehydrated foods. I had a bunch of bananas that were on the brink, so I thought banana chips were the perfect choice.

Making them could not be easier. Basically, it went like this:

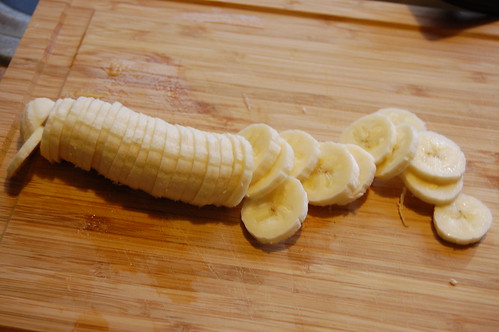
1) Cut the banana into thin slices.
DSC_0045

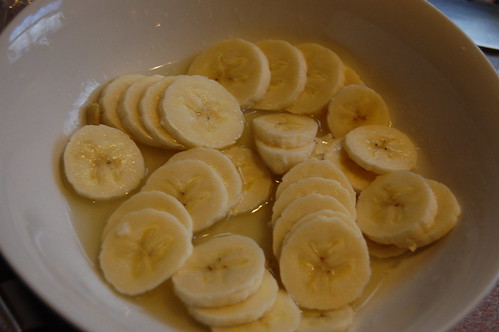
2) Give the slices a quick run through some lemon juice. You can add honey, cinnamon, or jazz it up in some other way but I opted to keep it simple. While this step is technically optional, it helps prevent the banana slices from getting too brown.
DSC_0046

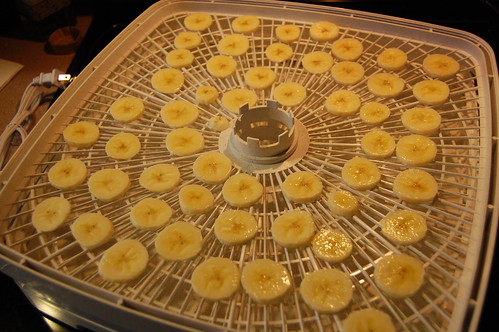
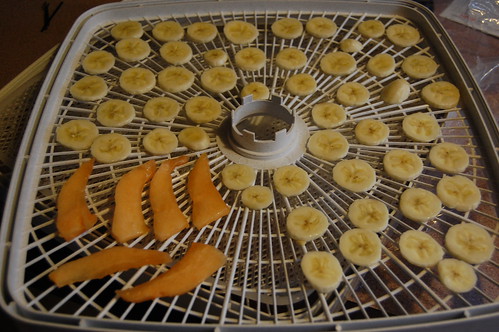
3) Place the slices on one of the dehydrator trays, leaving plenty of room for airflow. Three bananas filled almost two trays (I also threw a little cantaloupe on there just for giggles.)
DSC_0047

DSC_0048

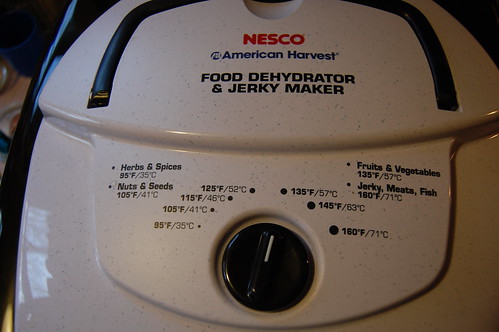
4) Turn the machine on and wait. And wait some more. And wait a little more. And just when you think they might be done — no — wait a few more minutes. All told I think it took about 6 hours of drying.
DSC_0049

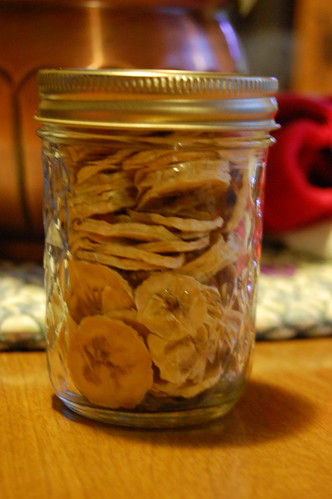
And that is really all there is to it! When the bananas felt done, I carefully took them off the tray and stored them in a canning jar. For long-term storage you want something airtight, and you want to store them in a dark, dry place. But I knew these would not last that long.

DSC_0052

I don’t normally buy banana chips, but 2/3rds of my kids now love them. Jake and Noah both asked to take some for snack at school so I guess I will be making them more often. Honestly, it’s a great alternative to banana bread when those bananas are just a little too soft to eat. The dried cantaloupe was delicious, too!

I’m excited to experiment more: apple slices, zucchini chips, pears, watermelon, and of course herbs once the summer rolls around. Who knows, maybe I’ll even try making my own herbal tea mixes! So many possibilities!

countdown to 2012: desserts


 Countdown to 2011 with Finding Joy in My Kitchen

This week I am counting down to 2012 with SnoWhite from Finding Joy in My Kitchen. She is inviting readers to join in the fun by sharing their very best recipes of 2011. Today’s theme is desserts. This recipe for Sour Patch Grapes is a fun, light dessert when you don’t want anything too heavy.

It also makes a great snack and it’s a wonderful addition to any kind of potluck. I brought these to my son’s Pinewood Derby and they were a hit. I had to laugh every time someone asked me for the recipe because they are so simple and you could even put your kids to work making these.

Sour Patch Grapes (a.k.a. Glitter Grapes)

glitter grapes

countdown to 2012: best main dishes

 Countdown to 2011 with Finding Joy in My Kitchen

This week I am counting down to 2012 with SnoWhite from Finding Joy in My Kitchen. She is inviting readers to join in the fun by sharing their very best recipes of 2011. Today’s theme is main dishes. I’m cheating here a little bit because I really wanted to include this recipe, but couldn’t figure out where to put it, so… it’s going here 🙂

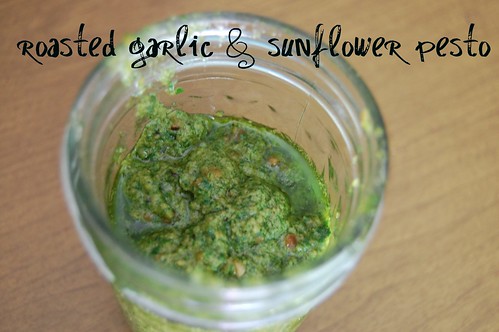
My roasted garlic and sunflower pesto was such a fun recipe to create from our bountiful CSA basil share last summer. You can use pesto in a variety of ways with your main dishes. Naturally, you can use it as a pasta sauce, but it’s also wonderful on pizza, with chicken, or thrown into a batch of roasted tomato soup. I hope you enjoy this one!

Roasted Garlic and Sunflower Pesto

roasted garlic and sunflower pesto 

countdown to 2012: breakfast dishes

 Countdown to 2011 with Finding Joy in My Kitchen

One of my favorite blog finds this year was Finding Joy in My Kitchen. If you haven’t visited, make sure you do because SnoWhite is a great source for healthy recipes! This week she is counting down to 2012 and inviting readers to join in the fun by sharing their very best recipes of 2011. Today’s theme is breakfast dishes.

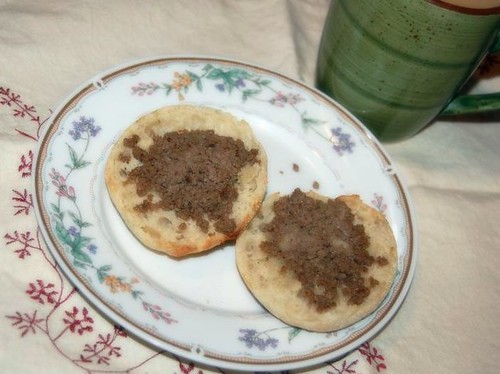
You’re going to have to take my word on this one. The photo isn’t the greatest, and yes I know that the recipe sounds a little… well, strange. I mean spiced ground pork? With milk? For breakfast? Trust me, it took years before I would even try this recipe. But once I had, I was a convert. Yum!

Cretons
cretons

friday favorite finds

Since I am both addicted to Pinterest and I love finding new recipes, I though it was high time that I link up with Finding Joy in My Kitchen‘s Friday Favorite Finds. I found some great recipe inspiration and in case you don’t follow me on Pinterest (of course, I’d love if you did — here I am!), I want to share them with you.

Let’s star with this roasted tomato soup. I made it the other night and it was fantastic! I didn’t use the tomato paste, and I added pesto and a roasted red pepper and it was just so super good. Drew liked it chilled, as well.

Roasted Tomato Soup

Source: sproutedkitchen.com via Carol on Pinterest


Since I wanted fresh bread with my soup, I found a really basic recipe I liked. Next time, though, I’ll decrease the amount of salt. It didn’t need that much.

Bread Machine White Bread

Source: allrecipes.com via Carol on Pinterest


And here a few I am dying to try:

Onion Soup Stuffed Mushrooms

Source: thepioneerwoman.com via Carol on Pinterest

“Comeback” Sauce

Source: syrupandbiscuits.wordpress.com via Carol on Pinterest


Bourbon-Chocolate Milkshake

Source: imbibemagazine.com via Carol on Pinterest

For more great food pins head over to Finding Joy in My Kitchen. This was actually a slow week for me as far as pinning recipes, so you’ll find a lot more over there!

roasted garlic and sunflower pesto

Yesterday I wrote that I was planning to make a pesto to use up most of my CSA basil. Now, I’ve never made pesto before and I’m not actually a big pesto fan, but something was inspiring me. I was determined to create something delicious. I considered what I don’t like about most pestos, I looked at the ingredients I had in my pantry and I came up with this recipe for roasted garlic and sunflower seed pesto. And it is both easy and deee-licious!

roasted garlic and sunflower pesto

This version takes a little longer to prepare than a raw pesto, but the flavors are more subdued, the color is bright, and really it is not that much more work. I decided to use sunflower seeds instead of pine (pignoli) nuts, because 1) I had them and 2) they are a lot easier on the wallet.

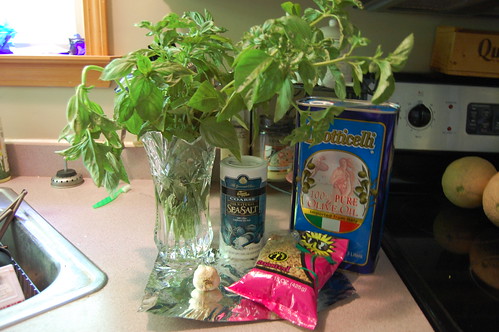
First, get everything you need: foil, garlic, olive oil, salt, and basil. (Store your fresh basil in a vase with water, as you would fresh flowers. It lasts longer this way, plus it looks pretty.)

roasted garlic and sunflower pesto

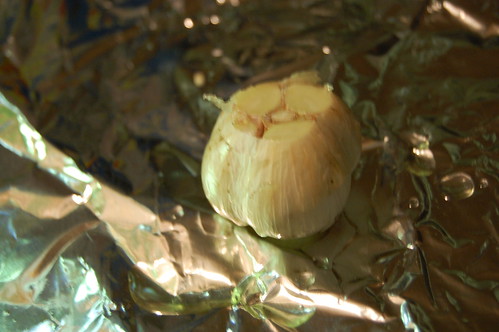
Now, let’s roast that garlic. Cut the stem end off the garlic, place it on a bit of tin foil and drizzle olive oil over it. Pop it in a 450-degree oven for about one hour.

roasted garlic and sunflower pesto

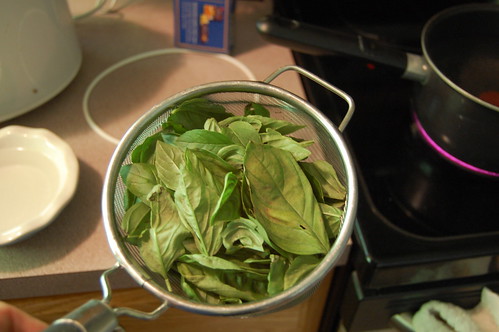
While the garlic is roasting, pull off about 2 to 2.5 cups of basil leaves.
roasted garlic and sunflower pesto

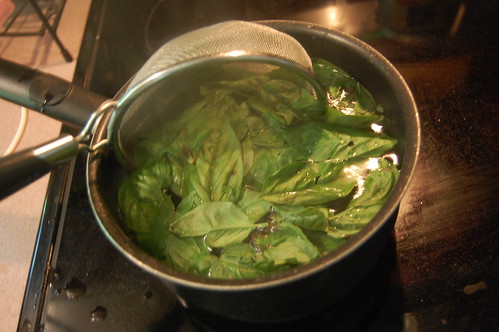
When the garlic is done roasting, take it out of the oven and let it cool. Now, get a pot of water boiling. We’re going to blanch the leaves. Are you ready? I promise, this is super easy and it will make the leaves blend smoother. Fill a bowl with ice water and keep it close to the stove. You’re going to need it to “shock” the blanched basil leaves.

One the water is at a rolling boil, dump the basil leaves in and leave them there for about 1 minute. (Sidenote: if you’re going to serve the pesto immediately after making it, just use this water to cook your pasta.)
roasted garlic and sunflower pesto

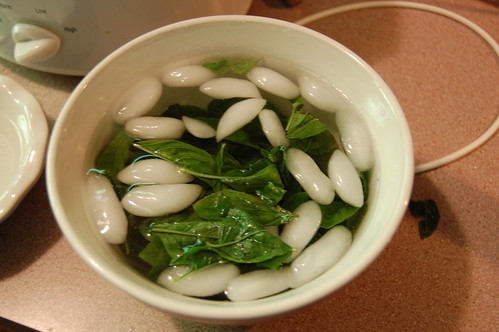
Immediately place them in a bowl of ice water to stop the cooking. You can use a slotted spoon for this.
roasted garlic and sunflower pesto

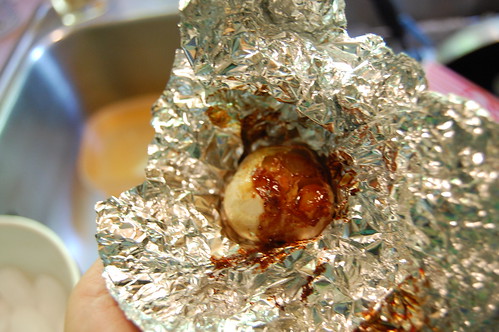
Now, unwrap that delicious package of roasted garlic. This is why the pesto is so good (in my opinion). Roasting the garlic takes away that sharp, bitter taste that I dislike in most pestos.
roasted garlic and sunflower pesto

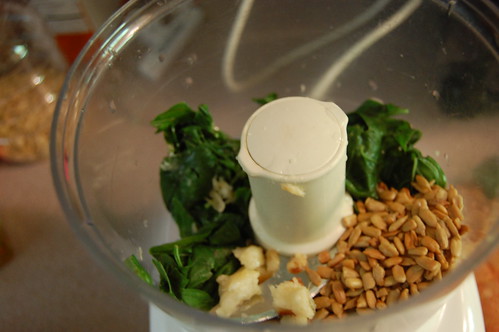
Add the blanched basil leaves, the roasted sunflower seeds, and the roasted garlic to the bowl of your food processor. The garlic cloves should come out pretty easily, but you might have to help them along with your fingers.
roasted garlic and sunflower pesto

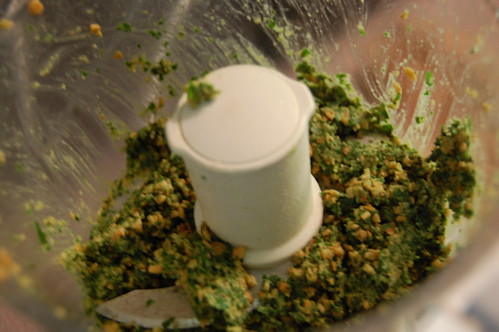
Pulse until the mixture turns into a coarse meal that looks something like this (you will probably need to scrape down the sides a couple times):
roasted garlic and sunflower pesto

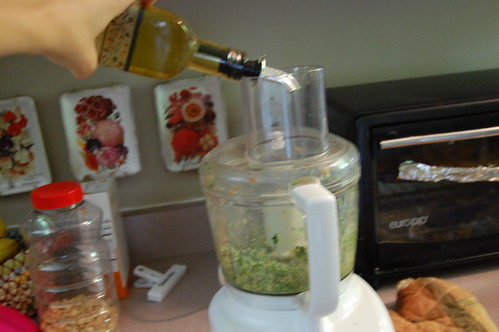
Turn your food processor on and start drizzling in the olive oil until it reaches your desired consistency.
roasted garlic and sunflower pesto

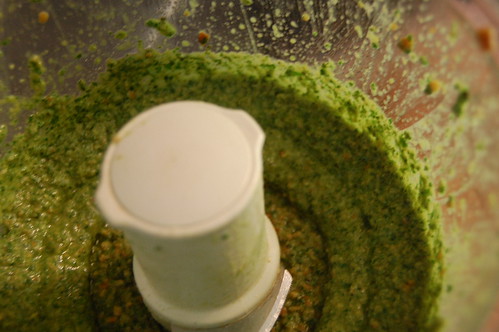
I like mine a little on the thicker side. It’s easy enough to thin with olive oil, and I like to have the option to use it as a sandwich spread.
roasted garlic and sunflower pesto

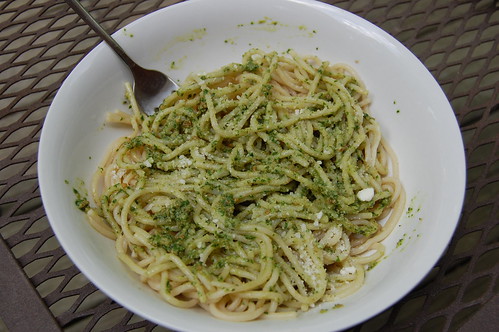
Since it was approaching lunchtime when I made this yesterday, I had a great excuse to try it. I tossed it with some spaghetti, sprinkled on some Parmesan cheese, and I think I actually exclaimed, “Holy sh-t! This is is good!” This was remarkably close to my husband’s reaction, which was, “This doesn’t taste like pesto. This is good!”
roasted garlic and sunflower pesto

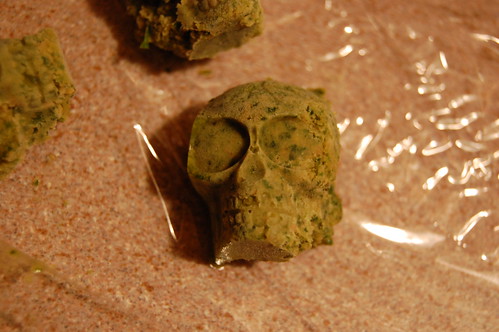
Unfortunately, you cannot home can pesto. At least I couldn’t find a safe method to do so, and I’m not going to take chances. You can, however, freeze it. If you want to freeze it in a glass jar or plastic container, cover the pesto with a layer of olive oil and be sure to leave about 1/2-inch of head room for expansion. You can also freeze it in tablespoon-sized portions to add to soups, stews, or just when you want an individual portion. The easiest way to do this is in an ice cube tray. Because we have an ice maker on our fridge, the only ice cube trays I have are fun shapes (usually for Jell-O jigglers). I decided to make pesto skulls:
roasted garlic and sunflower pesto

So there you have it. My very long-winded explanation for a very simple recipe!

Roasted Garlic and Sunflower Pesto

roasted garlic and sunflower pesto

2 c. fresh basil leaves
1 head of garlic
1/2 cup roasted, unsalted sunflower seeds
1/2 c. olive oil, plus extra for roasting garlic
pot of boiling water
bowl of ice water
salt to taste (optional)

Cut the stem off of a garlic clove and place it on the center of an aluminum foil square. Drizzle with olive oil, wrap tightly, and roast in a 450-degree oven for about 1 hour. When the garlic has finished roasting, start a pot of water boiling. Blanch 2 cups of basil leaves for approx. 1 minute. Immediately immerse leaves in ice water. Combine the blanched basil leaves, roasted garlic cloves, and sunflower seeds in a food processor. Pulse until the mixture forms a coarse meal. Start your food processor again and slowly pour in the olive oil until it reaches your desired texture.

Use immediately or store in the refrigerator for 2-3 weeks. This freezes well.

Be sure to visit Sandra at Diary of a Stay at Home Mom to check out other delicious recipes!

best-ever vinaigrette

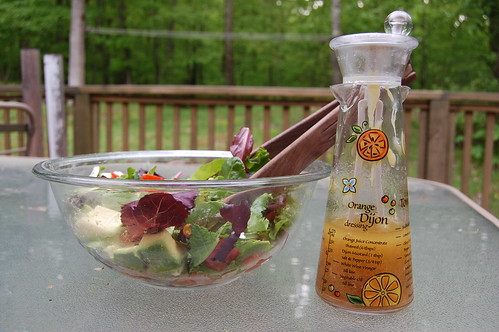
I don’t know about you, but I love a good salad. While bottled dressings are fine, there is nothing quite like a homemade vinaigrette to give your greens an extra bit of flavor. Earlier this summer (or was it back in the spring?) I had lunch at my friend’s house and she made a huge salad drizzled with the most amazing salad dressing ever.

best salad ever

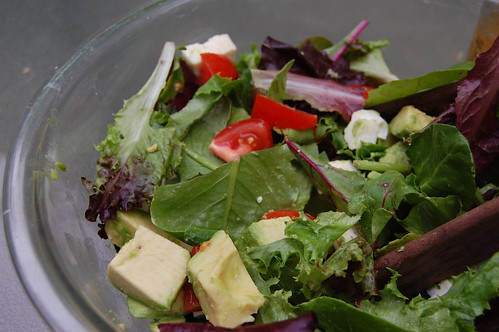
Around the house this has come to be known as “My Friend Michelle’s Salad Dressing” and I make it quite often. To have the authentic Michelle salad, you need to have lots (lots) of avocado in there. I also like to add tomato, fresh mozzarella, and homemade croutons. Chicken is a nice addition if you want to add a little protein. She said she originally got it from Cook’s Illustrated. Whoever created it is, in my opinion, a culinary genius.

My Friend Michelle’s Salad Dressing
(a.k.a. Lemon-Dijon Vinaigrette)
best salad ever

1 tsp. creamy Dijon mustard
1-2 garlic cloves, minced
1/4 tsp. sugar
1/2 tsp. salt
1/8 tsp. ground black pepper
1 tsp. Worcestershire sauce
2 tsp. juice from 1 lemon (I usually just squeeze the entire lemon in there)
2 Tbsp. red wine vinegar
1/2 cup extra-virgin olive oil

Whisk together mustard, garlic, sugar, salt, pepper, Worcestershire sauce, lemon juice, vinegar, and oil in medium bowl until well combined. You can also shake everything up together in a jar fitted with a tight lid. Shake or whisk again before dressing your salad if the vinaigrette separates.

best salad ever

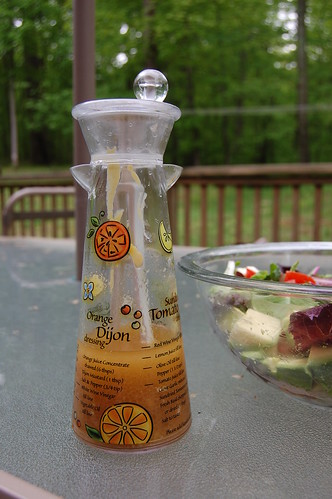
At the birthday party last weekend, I used this dressing for a tortellini salad that included turkey pepperoni, onions, and peppers and it was very yummy. I think it would be good on pretty much anything. Even straight from the cruet! OK, maybe that’s taking it a little too far, but yes it really is that good.

Be sure to visit Sandra at Diary of a Stay at Home Mom to check out other delicious recipes!