{Recipe} Creamy Chicken Noodle Soup

creamy chicken noodle soup

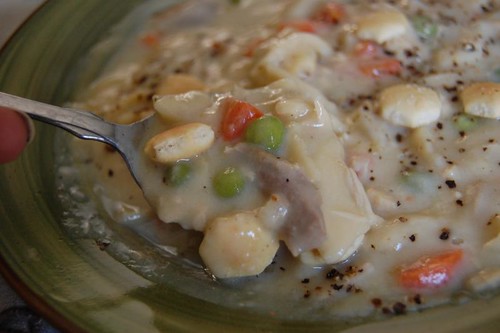
It’s been cold lately. Really cold. And we’ve all been enjoying lots of hearty soups. This season, Creamy Chicken Noodle Soup has emerged as my family’s all-time favorite soup. (At least for now.) Luckily, it is simple to make and we almost always have the ingredients in the fridge or freezer. It’s perfect for a simple Sunday dinner, but quick enough to whip up for lunch.

Because it is a rather heavy soup, I suggest pairing with a crisp salad. That’s what we like to do.

Creamy Chicken Noodle Soup
creamy chicken noodle soup

5 Tbsp. butter
1/3 c. diced celery
1/2 c. diced carrot
1/2 c. diced onion
1/2 c. frozen peas
6 c. chicken broth
2-3 chicken bouillon cubes (optional)
2 c. egg noodles
2 c. diced cooked chicken
6 Tbsp. all-purpose flour
1/4 tsp. poultry seasoning
1 1/4 c. half-and-half
1/8 tsp. black pepper

Melt 1 Tbsp. butter in a large stock pot over medium heat. Saute carrots, onions, and celery until they are soft (about 5 min.) Add the chicken broth, bouillon (if using), chicken, and egg noodles. Bring to a boil then lower the heat, cover, and simmer for about 30 min., stirring occasionally. Add the frozen peas to the soup.

Mix the flour and poultry seasoning together in a small bowl. Set aside. Melt 4 Tbsp. of butter in a saucepan over medium heat. Add the flour mixture to the melted butter, a little at a time, stirring constantly until the roux is smooth. Slowly add the half-and-half, again just a little at a time, constantly stirring until there are no lumps and the mixture is slightly thickened. Stir the sauce into the soup. Add pepper to taste.


{Recipe} Peanut Butter Pie

peanut butter pie

There are two desserts that stick out when I think about my childhood: Lemon Lush Pie and Peanut Butter Pie. I’m not even sure if my mom made either of these very often, but I loved them both. One day last week, when things weren’t going the greatest, I joked on Facebook about “stressed” just being “desserts” spelled backwards, and suggested pie was in order. My brother mentioned peanut butter pie and I could not get the idea out of my head.

My dad e-mailed me what what on mom’s recipe card and I put it all together for dessert on Sunday night. It was almost as good as I remembered… but mom’s is still better 🙂 It’s simple to throw together, and you could probably freeze it, too.

Peanut Butter Pie

1/3 c. peanut butter
8 oz. cream cheese, room temp.
1 c. powdered sugar
1 tsp. vanilla
2 c. Cool Whip
graham cracker pie crust

Beat together  peanut butter and cream cheese until combined. Stir in powdered sugar. Fold in vanilla and Cool Whip. Empty into pre-baked graham cracker pie crust, smooth the top, and refrigerate for at least 3 hours.

This pie also kicks if you use one of those Oreo pie crusts. But all I had was the regular graham cracker one, so I guess I will just have to make it again!

{Monthly Recipe Swap: Cookies} Pumpkin Cookies

pumpkin cookies

My friend Janet at Frugal and Focused has started a recipe swap feature on her blog and this month (the very first swap!) the theme is… cookies! How perfect for Christmas. I’m sharing a recipe for pumpkin cookies that I got from my friend Sherry so long ago. Even though they are more of a “fall” cookie, I love eating them year-round.

Pumpkin Cookies

  •  2 1/2 cups all-purpose flour
  •  1 teaspoon baking powder
  •  1 teaspoon baking soda
  •  2 teaspoons ground cinnamon
  •  1/2 teaspoon ground nutmeg
  •  1/2 teaspoon ground cloves
  •  1/2 teaspoon salt
  •  1/2 cup butter, softened
  •  1 1/2 cups white sugar
  •  1 cup canned pumpkin puree
  •  1 egg
  •  1 teaspoon vanilla extract
  • Optional: Chocolate chips, walnuts

Preheat oven to 350 degrees F (175 degrees C). Combine flour, baking powder, baking soda, cinnamon, nutmeg, ground cloves, and salt; set aside.

In a medium bowl, cream together the 1/2 cup of butter and white sugar. Add pumpkin, egg, and 1 teaspoon vanilla to butter mixture, and beat until creamy. Mix in dry ingredients. Add chocolate chips and nuts if you like. Drop on cookie sheet by tablespoonfuls; flatten slightly.

Bake for 15 to 20 minutes in the preheated oven. Remove, and cool cookies on a wire rack.

If you want to participate in the recipe swap, hop on over to Frugal and Focused to join in.

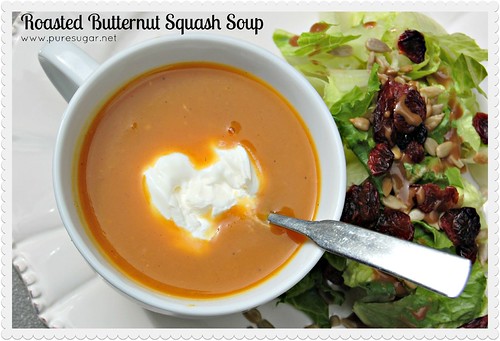
{Recipe} Roasted Butternut Squash Soup

butternut squash soup

To me, fall is all about squash. Spaghetti squash, acorn squash, and especially butternut squash. I enjoy it prepared pretty much any way possible, but my “go to” recipe is for a soup that is simple enough to whip up for lunch whenever I have a craving (so long as I have a fresh squash on hand, that is). I like to pair the soup with a salad consisting of greens, goat cheese, cranberries, walnuts or sunflower seeds, and honey balsamic dressing.


Roasted Butternut Squash Soup

1 medium butternut squash
1 medium onion, peeled and quartered
2-3 cloves of garlic, peeled
3 c. chicken broth
1/2 tsp. curry powder
1/2 tsp. pumpkin pie spice
salt, pepper, olive oil
sour cream

Preheat oven to 400 degrees. Cut squash in half and discard seeds (or save and roast them if you’re ambitious). Drizzle flesh with olive oil and sprinkle on some salt or pepper if you feel like it. Place the squash face-down on a foil-lined baking pan or cookie sheet along with the onion quarters and garlic cloves (which you should also drizzle with olive oil). Roast for about 40 min. or until the squash is soft.

Transfer the roasted vegetables to a medium saucepan and add the chicken broth, curry powder, and pumpkin pie spice. Bring to a boil, then reduce heat. Allow the soup to simmer for about 15 minutes, then puree with an immersion blender or in your food processor. Add salt and pepper to taste. Serve with a dollop of sour cream.

The sour cream is optional, of course, but I really feel like it gives the soup a delicious tang. If I have chopped walnuts on hand, I like to add those to the soup as well. I know, it sounds a little strange, but they add a delicious crunch in a soup that lacks a lot of texture.

I’m linking up with Sandra at Diary of a SAHM
because it’s Cooking Thursday!
Photobucket

{Recipe} Rustic Apple Crisp

apple crisp

I don’t know when I started making apple crisp. It wasn’t something I grew up with, so my best guess is that I found a recipe while I was in college and decided to try it. Yesterday, one of my college roommates actually brought up my apple crisp recipe on a food-related Facebook post, and I decided that I needed to make it.

Only, when I dug out the recipe I decided that it was time to change things up a bit and make it a wee bit healthier. I’m not going to lie: it’s a little bit time-consuming. But think of all the apple-slicing and butter-cutting as a sort of meditation time. I find it oddly therapeutic when I’m stressed or upset or angry to just take out my frustrations with some good old-fashioned slicing and dicing.

But I digress… Ahem.

I’m not saying that this is a super-healthy recipe, but I cut the amount of sugar in half, I reduced the amount of butter, and I switched out the type of flour. And I couldn’t even tell the difference! So go ahead… while everyone else is making the pumpkin desserts, you bring this baby to the table and see how fast it disappears.

Rustic Apple Crisp

4 c. sliced apples
1/4 c. water
1 tsp. cinnamon
1/2 tsp. salt
1/2 c. sugar
3/4 c. sifted white whole wheat flour
4 Tbsp. softened butter (half a stick)

Pre-heat the oven to 350 degrees. Spread the apples in an even layer over the bottom of an 8×8 square pan. Combine the water, cinnamon, and salt and sprinkle over the apples. Combine the flour and sugar and use a fork or pastry blender to work in the softened butter until the mixture is crumbly. Spread the crumbs over the apples and bake uncovered for about 40 minutes.

I like to add vanilla ice cream or whipped cream on the top. I bet you will, too!

{Recipe} Overnight Bone Broth

BoneBroth

I have admitted in the past that I am a soup snob. And it’s true. As a child, I was spoiled by my mom and grandmother with their delicious, homemade soups. Sure, there was the occasional bowl of Campbell’s Tomato, but the soups I remember from my childhood were full of barley, veggies, and homemade broth. The stuff in the cans or cartons just can’t compare, I don’t care which celebrity chef is on the label.

Making your own stock, or bone broth, is so ridiculously easy that it shouldn’t even need a recipe. In fact, I feel a little silly even writing about it. But I know people who have found it daunting to make homemade stock. If you’re making it on the stove top, it’s true — you need to pay a little bit of attention to it (only because you don’t want it to boil for too long). But there’s an easier way, perfect for even the laziest cook: just use your Crock Pot.

In the fall and winter, I roast a whole chicken twice a month on average. And often the weeks I don’t roast one on my own, I’ll pick up a rotisserie bird at Sam’s. After dinner, I just throw everything into my slow cooker and let it go. Here are the basic directions!

 Overnight Bone Broth

  • carcass from a roasted (or rotisserie) chicken (or turkey!), including skin, bones, and any resulting cooking liquid from roasting if you don’t use it for gravy
  • 1 medium onion
  • celery fronds or 1-2 celery stalks
  • 1-2 carrots
  • 2-3 bay leaves
  • 1/4-1/2 tsp. black peppercorns
  • 1 Tbsp. vinegar (white or apple cider recommended)
  • water
Combine first 7 ingredients in your slow cooker. Cover with water (I usually fill it to 1-2 inches below the top of the crock). Cook on HIGH for 2 hours, then turn to LOW and cook overnight. Strain out and discards solids. The amount of broth you end up with will depend upon how much water you use and how hot your Crock Pot cooks, but you should end up with quite a bit.
I know, it’s super-technical and specific right? LOL! Seriously, you just throw it in the pot with water and cook it. Sometimes I add a few cloves of garlic. Sometimes I add oregano or other seasonings, depending on whether or not I have a specific use for the broth.

So now that you have all this yummy stock, what do you do with it? Well you could use some of it to make Spicy Black Bean Soup, Creamy Chicken (or Turkey) and Wild Rice Soup, or maybe some Lazy Stuffed Peppers? I seriously love soup and even though I eat it all summer, it is extra delicious and comforting in the fall and winter. Now I just need some butternut squash so I can make a big pot of autumn bisque!

I’m linking up with Sandra at Diary of a SAHM
because it’s Cooking Thursday!
Photobucket

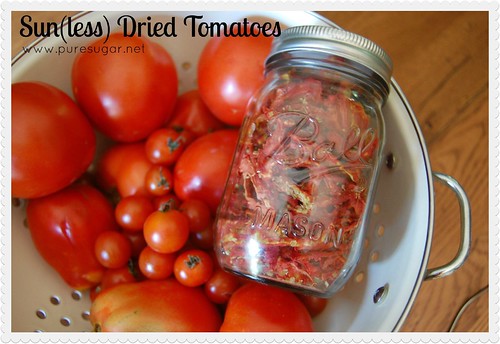
{Recipe} Sun(less) Dried Tomatoes

driedtomatoes

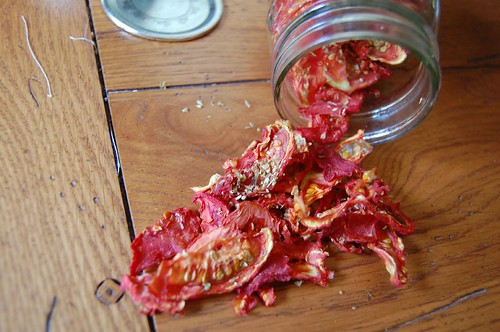
Although I have not yet finished this week’s CSA post, we got another 7 lbs. of tomatoes! Hooo-wee! So, I decided to whip out my dehydrator and make some dried tomatoes. They taste like sun-dried tomatoes, but you don’t have to leave them on a screen outside for several days 🙂

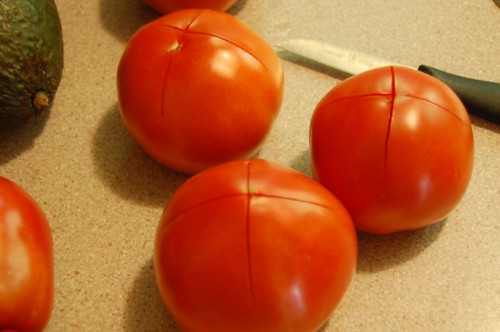
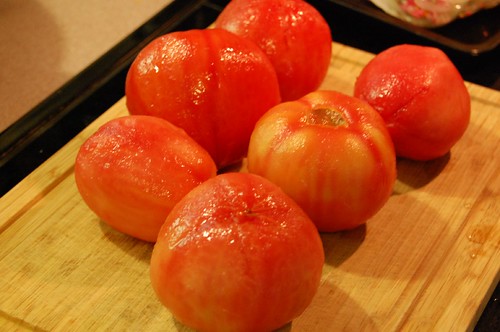
The first thing I did was to peel the tomatoes. This step is totally optional, but I don’t love the skin so I took the extra step.

DSC_0645

DSC_0648

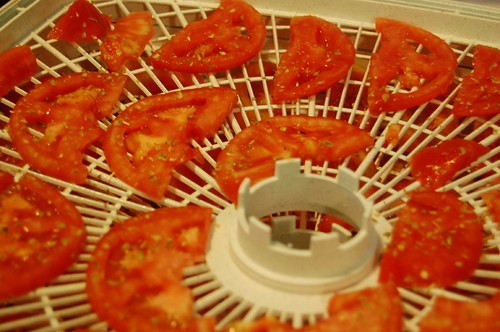
Next, slice them very thin — 1/4-1/8 of an inch. Use a serrated knife. You may keep the seeds or remove them. I think removing them helps speed the drying time, though.

DSC_0649

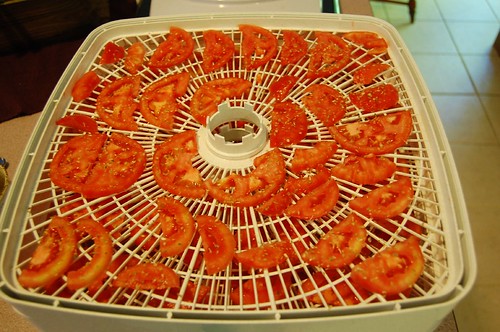
Arrange the slices on your dehydrators trays that have been misted with cooking spray or brushed with olive oil. Don’t crowd them — leave plenty of room for the air to circulate! At this point, feel free to season them if you’d like. I sprinkled on some salt and oregano.

DSC_0650

Turn your dehydrator to 135 degree and let it go for 8-12 hours. Check on the tomatoes periodically and rotate your trays if necessary.

DSC_0653

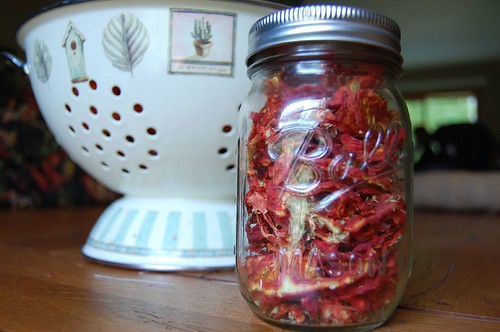
Make sure the tomatoes get very dry, not just chewy and tacky. Once they’re done, let the tomatoes cool off and then package them in an airtight jar or bag. Store in a cool, dry place. For long-term storage, stick them in your freezer.

Untitled

Use the dried tomatoes on pizza or salads, or add to stews or pasta dishes. Or just eat them for a snack. I don’t really care for raw tomatoes, but these are oh so good!

DSC_0684

I’m linking up with Sandra at Diary of a SAHM
because it’s Cooking Thursday!
Photobucket

{Recipe} A Yankee’s Version of Pimento Cheese

Pimento Cheese

I’m a New England gal. OK, yes I’ve lived in New York for the last 12 years and that’s not technically New England, but it’s close enough in my book. My point is, I am ignorant about all things Southern. I revel in my Northern-ness (much as southern gals are proud of their own heritage). But that doesn’t mean I can’t appreciate a tasty Southern treat (or all of them!). So when my friend Stef at Down the Primrose Path started talking about something called “pimento cheese” I was intrigued.

I, lover of all things cheese, had never heard of this. Pimento loaf? Yuck, but yes. Pimento-stuffed olives? Of course — I eat them all the time. But not pimento cheese. (Unless you count the cream cheese/green stuffed olive mixture I use to stuff celery on Thanksgiving.)

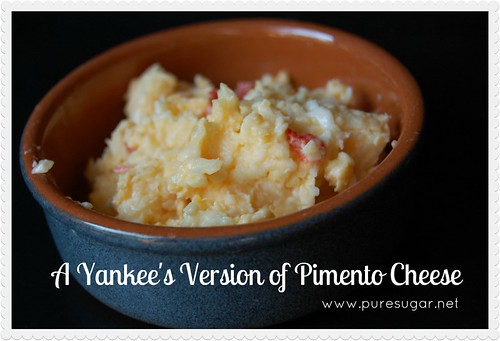
Then, one night I was flipping through an issue of Rachel Ray’s magazine and there it was: a recipe! Of course, I trust my Southern friends a little more than RR, so I took tips from Stefani and whipped up a pot the other night. When I took the ingredients out the fridge and looked at them all together, I questioned myself a bit but continued with the recipe anyway. And when I tried it… well, I was hooked! I think I scarfed down about half the batch that afternoon.

From what I understand of pimento cheese, everyone makes it a little bit different, but the three primary components are cheddar, pimentos, and mayo. In every article I’ve read, a brand called “Duke’s” is preferred, but I’ve never heard of or seen that up here so I went with good old Hellman’s. As I mentioned, my version was thrown together with tips from a friend, so feel free to change things around, use different cheese, whatever! And if you have a favorite pimento cheese recipe, please share it with me!

A Yankee’s Version of Pimento Cheese

Pimento Cheese

4 oz. Pepper Jack Cheese, shredded
4 oz. Sharp Cheddar Cheese, shredded
3 heaping Tbsp. chopped pimentos
Mayonnaise – just enough to mix it all together
Salt & pepper to taste

Combine first three ingredients in a bowl. Mix in a small amount of mayonnaise. Add more mayo, just a little at a time, until the mixture comes to your preferred consistency. (I like mine less mayo-y and a little more thick). Season with salt & pepper to taste.

Traditionally, pimento cheese is served as a sandwich on white bread with the crusts cut off (at least according to this NPR story). But I really liked eating them on Oopsie Rolls – my favorite low-carb “bread.” I definitely see this recipe become a kitchen staple. It’s the perfect little extra yummy bite to have with soup or a salad!

I’m linking up with Sandra at Diary of a SAHM
because it’s Cooking Thursday!
Photobucket

{Recipe} Blueberry Lime Jam

blueberry lime jam

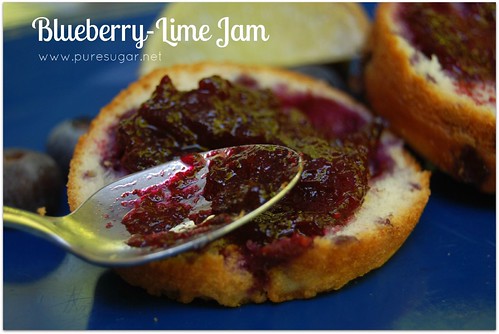
Well, I haven’t just been crafting. I’ve been busy in the kitchen too. When blueberries were on sale last week at Shop Rite, I jumped on the sale in order to make my favorite spread (coincidentally the very first thing I ever made when I learned to can): blueberry-lime jam. Everyone is always all about the strawberries, it seems, but I will bide my time and wait for summer blueberries and can my butt of even if it’s 92 degrees outside (which it happened to be).

As with any and all things canning, in the interest of food safety it’s important to follow trusted recipes. Canning is more of a science, really. And if you don’t get things just right you can end up with a nasty case of botulism. But don’t let that scare you off, because really — if you can follow some directions and boil water, then you can totally do this. And it will be better than anything you buy in a store!

This recipe is based on one from the Ball Blue Book. I used no-sugar pectin so I could reduce the amount of sugar I used in the recipe (otherwise I find the sweetness cloying). Also, I always use bottled lime juice because the acidity is consistent. There is lots of back and forth on whether to use fresh or bottled, but for something like this, I find that using the store-bought juice is easier and I know it’s high enough in acid.

Blueberry-Lime Jam

blueberry-lime jam

4 1/2 cups blueberries
1 package dry no-sugar-needed pectin
3 cups granulated sugar
1 tablespoon lime zest
1/3 cup bottled lime juice

Crush the blueberries one layer at a time. (Do not wimp out and use a food processor — use a fork or a potato masher. It’s therapeutic and you want those little bits of blueberry in there. Save the processing for blueberry butter.)Next, combine the crushed blueberries and pectin in a large saucepot. Bring it to a boil, being sure to stir frequently. Then add your sugar, stirring until it is all dissolved. Stir in the lime zest and lime juice and return the jam to a rolling boil. Boil hard (no little bubbles — wait for the serious bubbles) for 1 minute, stirring constantly.

Remove the pot from the heat and skim off any foam if you have it. Ladle the hot jam into hot jars, leaving 1/4-inch headspace. Adjust two-piece caps and process for 15 minutes in a boiling water canner. (You might have to boil longer if you live in a high altitude. Consult a canning guide (such as Ball Canning) for correct times.

If you don’t have canning equipment, you can also store this in your fridge, though I’d try to use it up within a few weeks if you skip the processing step.

Yield: about 5 half-pints.

Note: Take it from me and don’t boil it longer than the 1 minute called for in the recipe because it will affect the consistency of your jam. It will taste fine, but it will be a little more goopy. If you’re just making it for your own use, that’s no big deal, but if you are giving it is gifts, you probably want it more aesthetically pleasing.

There’s still lots of time for blueberries (at least here in the Northeast), so if you get your hands on some at a good price, try out this recipe!

Linking up with: Cooking Thursday with Sandra at Diary of a SAHM.

{Recipe} Cheesesteak Stuffed Peppers

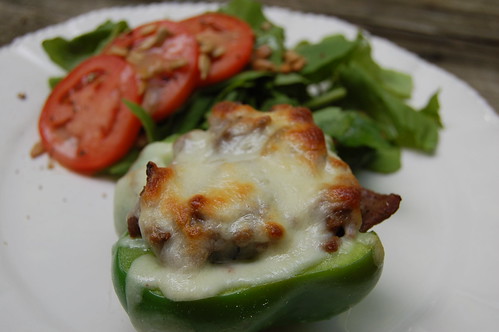
cheesesteak stuffed peppers

I’ll be honest with you: I’ve never been a fan of stuffed peppers. I hate mushy peppers and when you bake them, that texture seems inevitable. But then I saw a recipe for Philly Cheesesteak Stuffed Peppers from Peace, Love, and Low Carb. They looked so good, that I knew I had to try them.

Originally I was going to make these for dinner tonight, but then I realized that the boys would probably complain and since I’m not feeling great today, I just didn’t want to deal with that. And it’s just as well because I only had enough steak for two servings — me and Drew!

I did make several changes to the original recipe. But since I didn’t measure anything (I rarely do!), I can only give you a basic idea of what I did.

First, I melted butter (I used clarified butter for no real reason other than that’s what I grabbed out of the fridge). Then, I sauteed a bunch of sliced onions with salt and pepper until the got soft.

Next I added thinly sliced steak. I used beef tenderloin. (Grass-fed beef tenderloin is on sale at Shop Rite this week, so I was all over that — I cut it into steaks and used the small end to make this dish.) I seasoned it with a little more salt and pepper and a few dashes of Worcestershire sauce. While the steak cooked I cut a green bell pepper in half and removed the seeds.

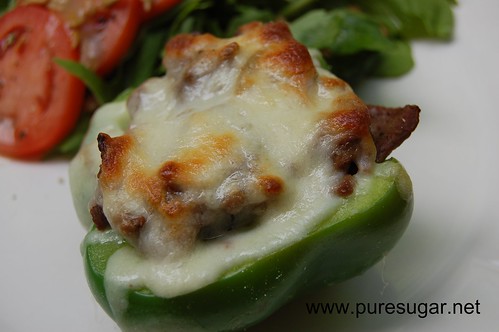
I put some shredded Italian cheese blend on the bottom of each pepper half, then divided the cooked steak and onion mixture between the pepper and then topped it with more shredded cheese.

I baked the peppers at 400 degrees until the cheese was all melty and delicious-looking. I think it took about 15 minutes (really, I wasn’t paying attention).

Then I served those babies up with an arugula, tomato, and sunflower seed salad with My Friend Michelle’s Vinaigrette.

DSC_0150

Then the real test: would Drew like it? And yes. Yes, he did. He requested I make it again, even 🙂

These were so much more fun to eat than many of the other low-carb cheesesteak recipes where you basically throw all the ingredients in a bowl. The peppers retained a crispness and the cheese was gooey and the steak was delicious (of course — it’s steak!).

Be sure to check out the original recipe for exact measurements if you don’t want to fly by the seat of your pants like me 🙂