{Recipe} Old-fashioned Apple Crisp

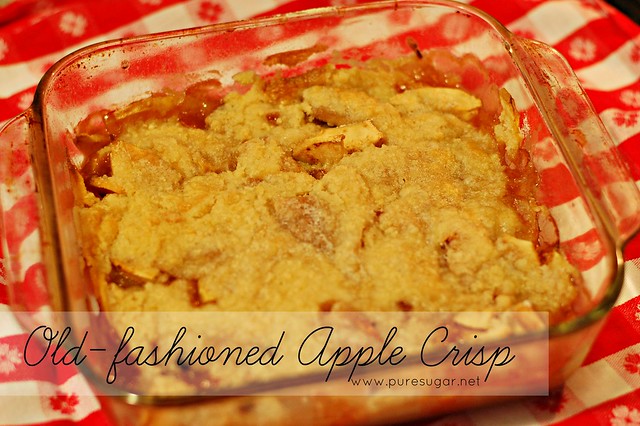
Old-fashioned Apple Crisp

It seems that pumpkin (or pumpkin spice) gets all the attention as the featured fall flavor. But you know what? As much as I love pumpkin, I still adore apple. Apple cider, apple pie, and of course… apple crisp all top my “must make” list for autumn. 

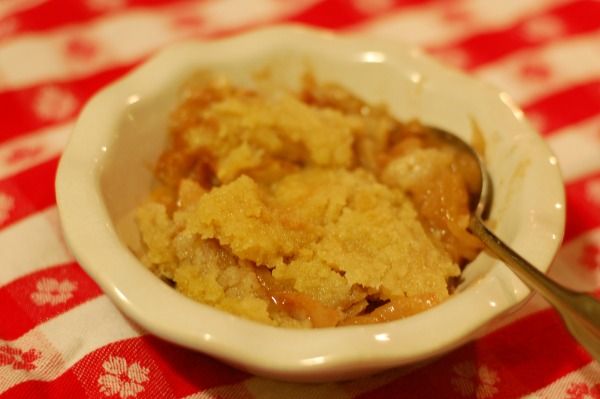
I think this was another recipe I started making while in college (thinking back, I did a lot of cooking in that Amherst apartment). Sure there are more exciting variations on apple crisp. They might call for oats or walnuts or something fancy. But I love the simplicity of this recipe. It never lasts long in my house, and is especially delicious warm and topped with a little vanilla ice cream. Enjoy!


Old-fashioned Apple Crisp
A simple dessert recipe the entire family will enjoy
Write a review
Print
Ingredients
  1. 4 c. sliced apples
  2. 1 tsp. cinnamon
  3. 1/4 c. water
  4. 1/3 c. butter, softened
  5. 1/2 tsp. salt
  6. 3/4 c. flour
  7. 1 c. sugar
Instructions
  1. Pre-heat oven to 350 degrees. Spread the sliced apples evenly in an 8x8 baking dish. Sprinkle the apples with a mixture of water, cinnamon, and salt. Stir together the sugar and flour and then work the butter in, using a fork or a pastry blender. Spread the crumb mixture over the apples and bake uncovered for 40 minutes.
Pure Sugar http://www.puresugar.net/

{Recipe} Turkey Divan Casserole

Turkey Divan Casserole | puresugar.net

With the kids all in school, we are back to a crazy schedule that includes a bunch of activities. We have Boy Scouts, Cub Scouts, CCD, afterschool electives… and that’s just for beginners. Add in my part-time job at the library, trying to keep up with my blog, and family commitments and you have a full calendar! But a full schedule is no excuse for not cooking. You just need to plan ahead!

Here are my top 5 ways to save time in the kitchen on weekdays.

  1. Menu plan. I make a home-cooked meal for my family six nights a week, and being organized is key. I’ve been menu planning since our pre-kid days. I look at what I have in my pantry and freezer, check my grocery store’s sale flyer, and go from there. 
  2. Be your own sous chef. Prep as much as you can ahead of time. Have an open burner on the stove? Fill a pot with water and cook rice, pasta, or quinoa for the week. Roast a pan of vegetables or boil them so you can reheat or quickly add them to dishes. Earlier this year I read An Everlasting Meal by Tamar Adler, and this simple tip stuck with me and has made a huge difference in the way I cook.
  3. Cook once, eat twice. Making a meatloaf? Buy enough ingredients to make two and freeze one. I also always try to keep the following pre-cooked items in my freezer: taco meat, browned ground beef, and shredded chicken. Within 20 minutes I can pull together a quick pot of soup or chili.
  4. Save the culinary experiments. We all love trying out new recipes, but save the multi-step gourmet dishes for weekends or days when you have extra time.
  5. Keep a file of quick-fix family favorites. Whether it’s juicy burgers, a fresh pasta dish, or a comforting casserole, it’s a relief knowing that you can throw together a home-cooked meal that everyone will love.

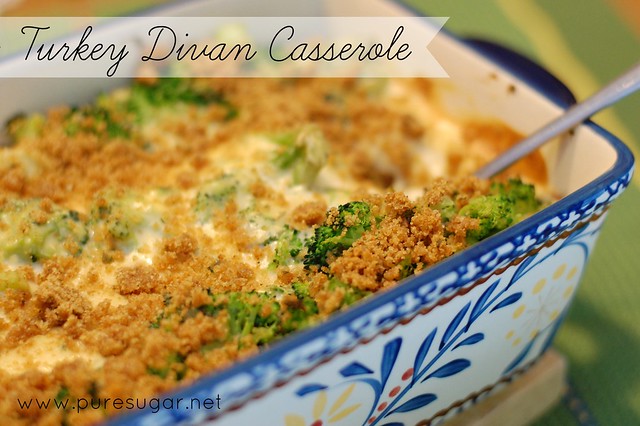
Turkey Divan Casserole

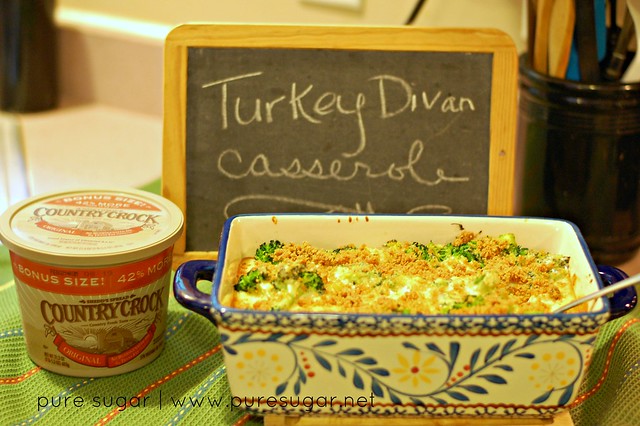
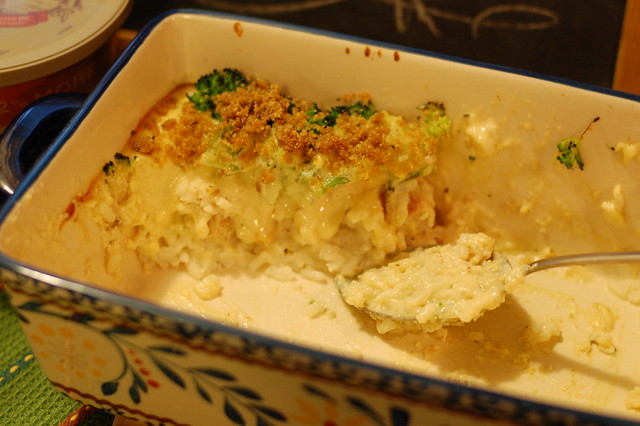
Turkey Divan Casserole is something I’ve been making for over 10 years. I occasionally change up the recipe depending upon what I have in my fridge (oh, that could be #6 – Be flexible). Don’t have rice? Use stuffing or egg noodles. Don’t have turkey? Use chicken. That’s the beauty of a casserole. It lends itself to whatever’s leftover. Country Crock Original Spread is delicious in this recipe. It contains 0 g trans fat per serving, no partially hydrogenated oils, and no cholesterol. Additionaly, it has 70% less fat than butter and 30% fewer calories than butter per serving.

Turkey Divan Casserole
Transform boring leftovers into delicious comfort food with this #QuickFixCasserole.
Write a review
Print
Ingredients
  1. 2 c. cooked rice
  2. 3 c. cooked, diced turkey
  3. 2 c. broccoli (leftover or blanched)
  4. 3 Tbsp. Country Crock Original Spread
  5. 3 Tbsp. flour
  6. 1/8 tsp. poultry seasoning
  7. pinch nutmeg
  8. 1 c. half & half
  9. 2 c. shredded sharp cheddar cheese
For topping
  1. 1 Tbsp. Country Crock
  2. 2 Tbsp. breadcrumbs
Instructions
  1. Preheat oven to 350 degrees. In a 2-quart casserole dish, layer the cooked rice, the turkey, and the broccoli.
  2. Melt 3 Tbsp. of Country Crock in a medium saucepan over medium heat. Stir in the flour, poultry seasoning, and nutmeg. Slowly add the half & half, whisking continuously. Continue to stir until no lumps remain. Remove from heat and add cheese. Stir until melted. Pour over top of casserole.
  3. Melt 1 Tbsp. of Country Crock and stir in the breadcrumbs. Sprinkle over top of dish.
  4. Bake at 350 degrees for 30 minutes. Serve with a crisp salad.
Notes
  1. This recipe can be prepped ahead of time. Let it come to room temperature before baking.
Pure Sugar http://www.puresugar.net/
Turkey Divan Casserole

You know it’s good when the kids just about clean the dish! (And yes, I did finish off the last few bites.) For more #QuickFixCasseroles, be sure to check out Country Crock on Pinterest. (And try not to drool all over your keyboard!)

I was selected for this opportunity as a member of Clever Girls Collective and the content and opinions expressed here are all my own.

{Recipe} Indian Potatoes & Peas

Indian Potatoes & Peas

Last night I made a pot of chicken curry and while I had out all my spices and ingredients, I decided to make a batch of Indian Potatoes & Peas while I was at it. This originally started out as a filling for samosas, but because I have a fear of deep-frying, it has become a simple side dish that is even better the next day. I have also frozen small containers of this recipe with some quinoa in there, too, and it tasted fine! I know sometimes potatoes don’t freeze the greatest, but the texture didn’t seem to change too much.


Indian Potatoes & Peas
Write a review
Print
Ingredients
  1. 4 med. potatoes, peeled and quartered
  2. 1-2 Tbsp. coconut oil or ghee
  3. 1 med. onion, diced
  4. 1 cup frozen green peas
  5. 1-inch chunk of ginger, peeled and shredded
  6. 1 jalapeno pepper, diced (remove the seeds if you want less heat)
  7. 1/2 c. water
  8. 1 tsp. salt (potatoes absorb salt, so you may need to add more)
  9. 1 Tbsp. curry powder
  10. 1/2 tsp. coriander
  11. 3/4 tsp. cumin
  12. 1/4 tsp. chili powder
  13. juice from 1/2 a lemon
Instructions
  1. Boil the potatoes in well-salted water until tender. Drain, and set aside to cool.
  2. Melt coconut oil or ghee (or fat of your choosing) in a deep skillet or large pot. Add onions and cook until translucent. Add the jalapeno, peas, ginger, and a little of the water (a splash at a time, just so the vegetables don't stick). Cook for about 3 minutes, or until the peas begin to thaw.
  3. Break the cooled potatoes into small chunks and add to mixture (I just do this right over the pan). Add the rest of the water and the salt, curry powder, coriander, cumin, and chili powder. Squeeze the lemon juice over everything and give it a good stir.
  4. Cook for an additional 10 minutes. Stir again before serving
Notes
  1. This is a highly nontechnical recipe. Use more or less water. Add more onion. Make it milder. Make it spicier. It's very forgiving, and very delicious.
Pure Sugar http://www.puresugar.net/
If you have some mint chutney around, it will really complement this dish! But it’s just as good plain.

{Recipe} Skillet Sour Cherry Cobbler

Skillet Sour Cherry Cobbler | www.puresuresugar.net

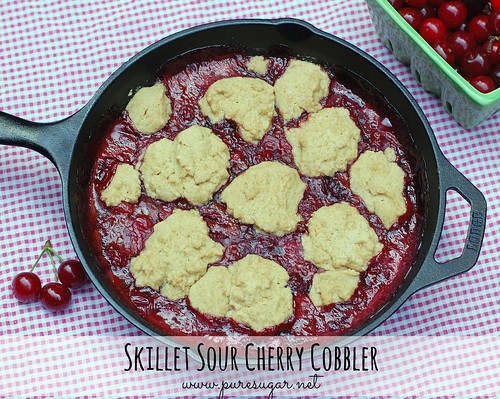
Sometimes I just feel so blessed to live where we live! Sure, once in a while I get homesick and think about moving back to Massachusetts, or feel like exploring a completely new area of the country. But by and large, my adopted home of the Hudson Valley suits me very well. One of the things I like best is all the pick-your-own farms. A favorite is Fraleigh’s Rose Hill Farm just a few minutes away in Red Hook. Yesterday we took advantage of some free time to head over and pick a real summertime treat: sour cherries.

Sour Cherries | www.puresugar.net

Contrary to the name, I don’t find sour cherries to really be all that sour. But certainly they are not as cloying as the sweet cherries. They are also infinitely easier to pit, which makes them my preferred cherry for baking, jam, canning, and so forth. The kids were begging me to bake a cherry pie, but I didn’t have all the ingredients for the crust so we went with a cobbler instead.

I was very excited to use my Lodge cast iron skillet for something besides steak!

Skillet Sour Cherry Cobbler | www.puresuresugar.net

Skillet Sour Cherry Cobbler
Write a review
Print
Filling
  1. 4 cups pitted sour cherries
  2. 2 Tbsp. cornstarch
  3. 1/2 cup sugar
  4. 2 Tbsp. lemon juice
  5. 1/2 tsp. vanilla extract
Biscuits
  1. 1 cup unbleached flour
  2. 1 tsp. baking powder
  3. 1/2 tsp. salt
  4. 2 Tbsp. sugar
  5. 1/2 tsp. cinnamon
  6. 6 Tbsp. cold butter, cut into pieces
  7. 1/4 c. boiling water
Instructions
  1. Preheat the oven to 350 degrees. Combine cherries, cornstarch, 2/3 cup sugar, lemon juice and vanilla in a bowl. Set aside and let everything come together.
  2. Combine the dry ingredients in a second bowl, adding the butter pieces last. Using a pastry tool or a fork, cut in the butter until the mixture becomes crumbly In another bowl, combine the dry ingredients, cutting in the butter until crumbly. Carefully add the boiling water, a little bit at a time, and stir until the mixture forms a soft dough.
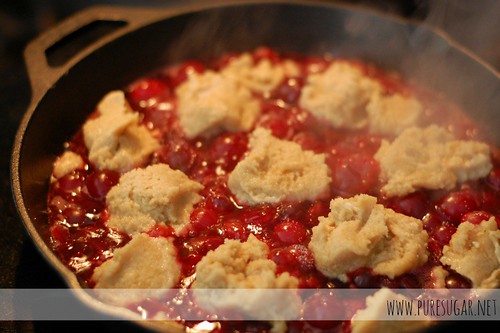
  3. Add the cherry mixture to a cold cast iron skillet and gently bring to a boil. Turn off the heat and drop spoonfuls of the biscuit mixture on top of the cherries. If desired, sprinkle extra sugar on top of the biscuits. Bake for 45 minutes until the biscuits turn golden.
Notes
  1. * You can probably use regular old AP flour -- I just prefer the unbleached flour and that's what I had.
  2. * You are probably supposed to use unsalted butter for this. I didn't have it and used regular butter. Tasted a-okay to me!
Pure Sugar http://www.puresugar.net/
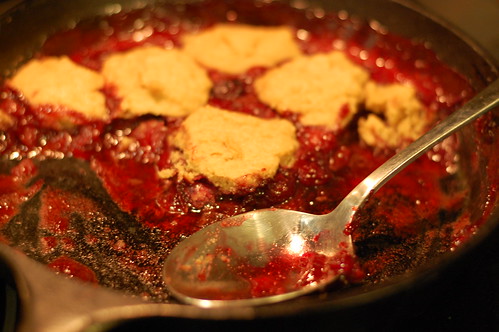
 All three kids oohed and ahhed as I took this delicious dish out of the oven. And Mean Mommy made everyone wait until supper was finished (and vegetables had all been eaten) before anyone could have a taste. But it was worth it!  Everyone savored this yummy dessert. It might have been better if I’d had whipped cream or vanilla ice cream, but I didn’t hear any complaints so I’m not sure anyone even noticed.

Skillet Sour Cherry Cobbler | www.puresuresugar.net

{Recipe} Blueberry Sour Cream Muffins

Blueberry Sour Cream Muffins | www.puresugar.net

Good morning, everyone! Today I was up bright and early around 5. The birds were loud and I just couldn’t fall back to sleep, so I decided to head downstairs. And bake. While scrolling through my old recipe site I found a muffin recipe that I’d completely forgotten about, so I tweaked it just a little and was very happy with the results!


Blueberry Sour Cream Muffins
A simple, quick muffin recipe.
Write a review
Print
Ingredients
  1. 2 cups biscuit mix (such as Bisquick)
  2. 1/2 cup plus 2 Tbsp. sugar, divided
  3. 1 egg
  4. 1 cup (8 oz) sour cream
  5. 1 tsp. lemon juice
  6. 1 cup fresh or frozen blueberries
  7. 2 tsp. lemon zest
Instructions
  1. Preheat oven to 400 degrees. In a large bowl, combine the biscuit mix and 1/2 cup sugar. Whisk the lemon juice, egg and sour cream together until combined. Stir this mixture into the dry ingredients just until moistened. (The batter will be very thick.) Fold in the blueberries. Fill greased or lined muffin tins half-full. Combine the lemon zest and remaining sugar and sprinkle a bit over each muffin. Bake for 20-25 minutes. Allow the muffins to cool in the pan for about 5 minutes before transferring them to a wire rack.
Notes
  1. Yield: 12 muffins
Pure Sugar http://www.puresugar.net/
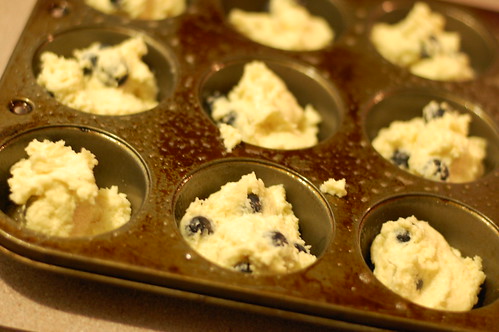
As I noted in the recipe, the batter is very thick when you combine the wet and dry ingredients. Just trust the recipe! Here’s a photo of how they looked in the muffin tin. They definitely have a consistency closer to drop biscuits before you bake them. (Sorry for the poor photo quality, but this was a good as it was going to get at 5:45 a.m.)

Thick Batter

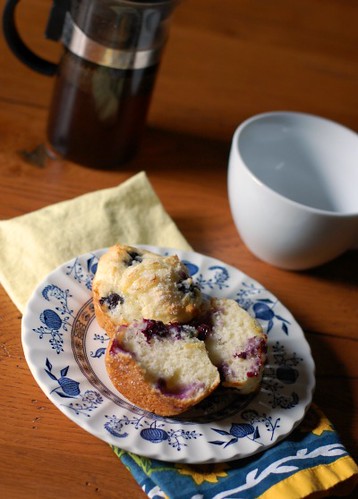
Sure enough, the muffins rose just fine and the kids were all happily surprised to have fresh-baked muffins first thing this morning. Of course, I enjoyed them too 😉 
Blueberry Sour Cream Muffins | www.puresugar.net

{Recipe} Masala Chili

DSC_0258-resize

I don’t even know how I came up with this recipe. I guess I was thinking of both my favorite chicken curry recipe, but also Indian-spiced chicken meatballs and somehow this happened. And I’m glad it did because it was easy and delicious. And quick. And perfect for this rainy day. Basically, I just started throwing things into a pot and tasting and at some point I decided “OK, this is actually good!”

Although we really enjoyed this recipe as written here, I feel like it’s missing something. Maybe some spinach? Maybe coconut milk instead of the yogurt? I don’t know… But it’s a starting point and I hope you play around with it. Let me know what adjustments you make and how you improve upon it!

Masala Chili
An Indian-spiced take on traditional chili.
Write a reviewSave RecipePrint
Ingredients
2 Tbsp. coconut oil or ghee
1 tsp. cumin seeds
1/2 c. diced onion
2 cloves of garlic, diced
1-2 chile peppers, diced (I used jalapenos because that’s what I had)
1-inch chunk of fresh ginger, shredded on a microplane
1 Tbsp. coriander
1/4 tsp. tumeric
1/2 tsp. cumin
1/2 tsp. chili powder
1/2 Tbsp. curry powder
1/2 tsp. salt
1 lb. ground chicken
1 15-oz. can of chick peas, drained and rinsed
1.5 c. tomato sauce
1/2 c. water
1 5 oz. container of plain yogurt
Cilantro (for garnish)
Instructions
In a stock pot, melt the coconut butter or ghee and add the cumin seeds. When they start sizzling, add the onions, garlic, ginger, and peppers. Cook until soft and then add the coriander, tumeric, cumin, chili powder, curry powder, and salt.
Add ground chicken and cook through. Add chick peas, tomato sauce, and water. Simmer for 15-20 minutes until flavors have all combined.
Remove from heat. Stir in yogurt. Adjust seasonings if necessary. Serve with rice or naan. Garnish with fresh cilantro.
Notes
A side salad of freshly sliced cucumbers and onions with a squeeze of fresh lemon juice is an excellent accompaniment to this dish.


Linking up with: Cooking Thursday
Photobucket

{Recipe} Carrot Cake Jam

Carrot Cake Jam

Have you guys heard about food swaps? Apparently they’re the cool new thing. People all over the country are whipping up delicious things in their kitchens (or growing them in their backyards) and then swapping for other tasty goods with like-minded individuals. So when our library director put a food swap on our calendar, I was really excited to participate! The only thing: I wanted to bring something a little bit different.

A few years ago I nabbed a Better Homes & Garden canning magazine. It had a recipe for carrot cake jam that I fully intended to make and enter in the Dutchess County Fair. I don’t know what happened, but I never got around to it. Until yesterday.

Now, before I share this recipe, be warned: there is a ton of sugar in it. But it’s jam. And that’s the way it goes. I did use no-sugar pectin so in theory I could have reduced how much I used, but I didn’t.

OK. So, the first thing you need to do is start your water bath and sterilize your canning jars, new lids, and bands.

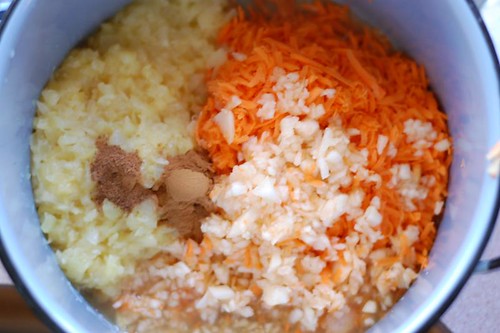
Next, combine 1 peeled diced pear (I used my food processor to make the pieces really tiny and save time), 2 cups of shredded carrots, a 16 oz. can of crushed pineapple in 100% juice (NOT heavy syrup), lemon juice (when canning, use bottled because it has a consistent pH), cinnamon, and nutmeg in a pot and bring to a boil. Cover and simmer for 20 minutes, stirring often.

Carrot Cake Jam

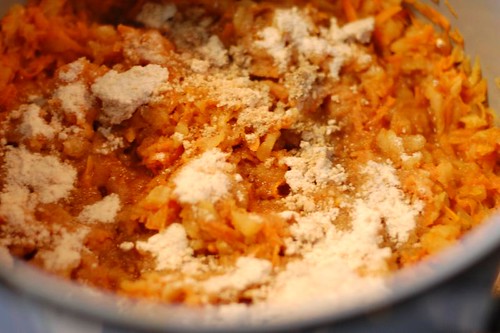
Then, take the pot off the heat and sprinkle your pectin over the mixture. Stir it in.

Carrot Cake Jam

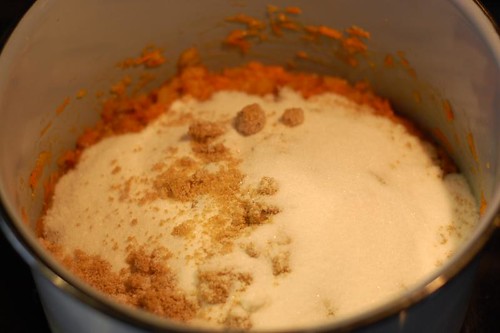
Now add your sugar. Just look the other way and dump in 4 cups of white granulated sugar and 2 cups of brown sugar. (Remember, you’re not eating massive amounts of this! Although then again… you might want to.) Stir it all up again.

Carrot Cake Jam

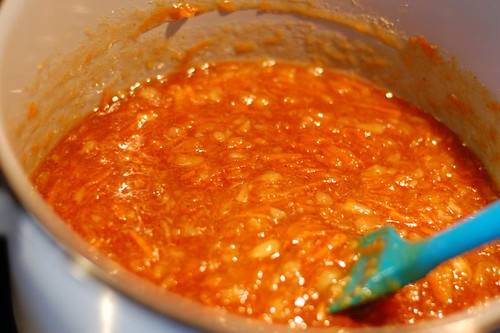
And like magic… you have jam!

Carrot Cake Jam

Bring it back up to a rolling boil and stir constantly for one minute while it’s boiling. Next, take it off the heat and add 1 Tsp. vanilla and (optional) 1/4 c. flaked coconut or raising. Because I am a wild woman, I added both.

Then ladle the jam into your sterilized jars, add the lid, snug on the band, and process for 10 minutes in a water bath canner.

IMPORTANT: Remember that processing time starts when the water returns to a big, angry boil. It does not start when you just put the jars into the pot.

I like to slather some cream cheese on (preferably homemade) bread and top it with the jam. I think it would also benefit from a sprinkling of walnuts.

This jam has been taste-tested and approved by my two boys, ages 7 and 10, so you know it’s good!


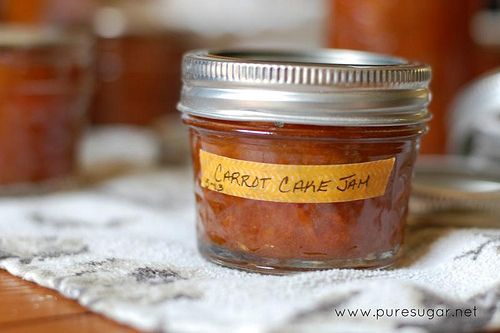
Carrot Cake Jam
Write a review
Print
Ingredients
  1. 2 c. shredded carrots (about 4 medium)
  2. 1 medium pear, finely chopped
  3. 1 15-oz. can of crushed pineapple packed in 100% juice
  4. 2 Tbsp. lemon juice
  5. 1 tsp. ground cinnamon
  6. 1/2 tsp. ground nutmeg
  7. 1 1 .75-oz package of pectin
  8. 4 c. granulated sugar
  9. 2 c. packed brown sugar
  10. 1 tsp. vanilla
  11. 1/4 c. flaked coconut or raisins (optional)
Instructions
  1. Combine carrots, pears, pineapple, lemon juice, cinnamon, and nutmeg is a large pot and bring to a boil, stirring constantly. Reduce heat, cover, and allow the mixture to simmer for 20 minutes, giving it a stir often.
  2. Remove the pot from the heat and sprinkle the mixture with pectin. Stir until it dissolves.
  3. Bring the mixture back to a boil, stirring constantly. Add the granulated sugar and brown sugar. Return to a rolling boil. Boil the mixture for 1 minute while constantly stirring. Remove from heat and skim off any foam with a metal spoon. Add vanilla and coconut/raisins.
  4. Ladle the jam into hot, sterilized jars leaving 1/4″ headspace. Wipe the rims and adjust the lids. Process in a boiling water bath for 10 minutes. Carefully remove the jars from the pot and allow to cool.
Notes
  1. Don’t forget to check the seals later on — you don’t want to store anything that hasn’t been properly processed!
Adapted from Adapted from Better Homes & Gardens Canning magazine, Summer 2011
Pure Sugar http://www.puresugar.net/


Linking up with…
Photobucket

{Recipe} Flourless Chocolate Torte

flourless chocolate torte

Last weekend I needed to make a flourless chocolate torte for a church event. It seemed simple enough (even though I broke the first one), and goodness knows I love chocolate so, even a broken torte is a-okay in my book! Anyway, I of course had to make a second one for the event and it came out so delicious I just had to share it here.

This is gluten-free, but certainly not sugar-free. I bet you could play around with various sweeteners to improve upon that, though.

But here’s what I think makes this torte so great — the butter is completely optional! Yes, that’s right. The instructions on the recipe print-out were unclear. It called for a stick of butter, but didn’t explicitly state what to do with it. So I didn’t use any in the first torte I made (aside from using it on the pan and parchment). As I mixed the sugar and eggs into the melted chocolate, I was concerned because the mixture was so thick and grainy, but it really turned out fine in the end. The resulting dessert featured a texture that is a little drier, a little more brownie-like.

I actually brought leftovers of both tortes to library story hour this week so I could have some “taste testers” and get their thoughts. The consensus was that both were delicious, and could be considered two different desserts due to texture and richness.

So here you go! A yummy (and super easy) gluten-free dessert. (If you want to make it completely butter-free, use another type of fat to grease the pan and parchment — coconut oil would work well here.) Oh, one more thing. I did not have any sort of pan that my springform would fit into to use as a water bath, so I just filled a 9×13 Pyrex casserole dish with boiling water and set it on the rack underneath my torte. It worked fine for me, your mileage may vary.

Flourless Chocolate Torte

flourless chocolate torte

    • 4 oz. (1/2 cup) bittersweet chocolate (*I just used semi-sweet chips — I think dark chocolate would be amazing)
    • 1/2 cup butter, cut into pieces (*optional, read above for my experience making it both ways)
    • 3/4 c. sugar
    • 3 large eggs, beaten
    • 1/2 c. unsweetened cocoa powder, plus additional for garnish

Preheat the oven to 375 degrees. Start water boiling for the water bath.

Butter the inside of an 8-inch springform pan. Line the bottom with a round of parchment or wax paper and then butter the paper.

If you are not using chocolate chips, chop your chocolate into small pieces. Melt the chocolate along with the butter in a double boiler and stir until smooth.

Remove the melted chocolate from the double boiler and whisk in the sugar. Add the eggs and whisk well to combine.

Sift 1/2 cup of cocoa powder over the chocolate mixture and whisk to incorporate the cocoa (this may take a few minutes and require scraping down the sides of the bowl).

Pour the mixture into your springform pan and place into the 9×13 pan (*see my note above if your pan will not fit). Place in oven and add boiling water to the 9×13 pan, filling it about halfway up the side of your springform pan. Bake for 25 minutes.

Remove the springform pan and cool on a rack for 5 minutes. Carefully (carefully!) remove the sides (you might want to use a knife and just go around the sides first to make sure nothing sticks. Gently turn the cake out onto a serving plate and remove the paper from the top.

When the cake is completely cool, garnish with sprinkled cocoa or powdered sugar. Or if you’re feeling crazy and motivated, a ganache topping would put this dessert over the top!

I made these last Saturday and was writing about it on Facebook. My brother actually made the recipe that night too and was very pleased with how his turned out! He suggested adding peanut butter chips. I think that is an excellent idea.

Linking up with…

Cooking Thursday
Photobucket

{Recipe} Roasted Brussels Sprouts & Winter Salad

This is another one of those recipes that I kind of feel silly posting. It’s just so simple! But just in case you are still looking for a way to prepare Brussels sprouts that leaves them nutty and delicious… here it is!

My friend, a graduate of the Culinary Institute of America, was talking to me about Brussels sprouts last summer, and how he roasts an entire pan on Sunday and lives off of them all week because they are just so good. In addition to being a trained chef, he’s a kettle bell champ and he works at one of the Canyon Ranch resorts, so I definitely trust his opinion when it comes to healthy, delicious food. The first time I made these, my 10-year-old went back for seconds, so that’s just further proof of their yumminess!

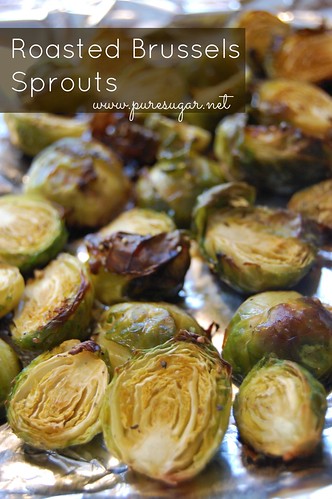
Roasted Brussels Sprouts

sprouts

Brussels sprouts
olive oil
salt
pepper

Cut each sprout in half and toss into a bowl. Drizzle with olive oil and season with salt and pepper. Make sure the olive oil is on every sprout. Use a spoon or your hands to mix it all up. Then, place the sprouts on a foil-lined baking sheet. My friend suggested I put them cut-side down to get more of that roasty goodness. Place in a 400-degree oven and cook for about 25-30 minutes.

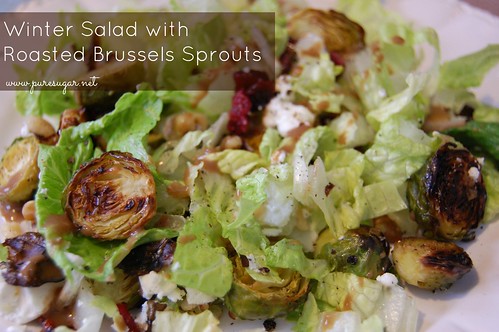
Now, what do you with them after this? Well, they are delicious as-is, or with a squeeze of lemon juice to kick it up a bit. Or you can toss them in a salad. I know — what? That sounds a little weird. Well, just trust me.

winter salad

Make yourself up a salad with your favorite greens, dried cranberries, walnuts, and a bit of goat cheese. Add the Brussels sprouts and toss with a bit of Balsamic vinaigrette. Delicious!!!

Many of us grew up knowing only boiled, tasteless Brussels sprouts. Give this method a try and I bet it will change your mind.

I’m linking up with Sandra at Diary of a SAHM
because it’s Cooking Thursday!
Photobucket

{Recipe} Crock Pot Hot Fudge Cake

valentine's day

I hope you all had a lovely Valentine’s Day! Aren’t my roses gorgeous? Drew surprised me with a bunch this year — such a sweetie! I know so many people who are down on Valentine’s Day and true, you shouldn’t need a single day to express your love for someone (I know that’s certainly not the case with me and my amazing hubby), but I enjoy being a little extra smoochy and making things a little extra special. But that’s just me.

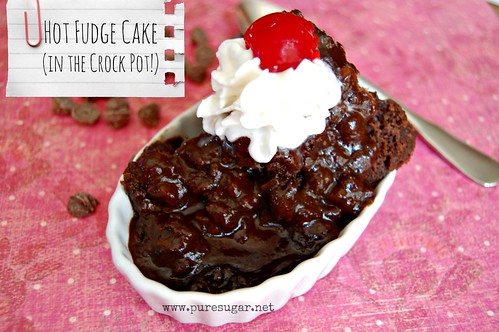
We had a delicious home-cooked dinner. I made surf & turf (filet mignon and sizzling shrimp scampi), steamed broccoli, a chopped salad, and baked potatoes. For dessert I made this decadent Hot Fudge Cake!

Oh, there is nothing like an ooey, gooey chocolate dessert… especially on Valentine’s Day! This is one of my favorite recipes, and best of all, you cook it in the Crock Pot so you can leave your oven free to bake up some other delicious dishes.

Hot Fudge Cake (in the Crock Pot)
hot fudge cake

Cake:
1 cup AP flour
2 tsp baking powder
1/4 tsp salt
1/2 cup sugar
2 Tbsp cocoa powder
1/2 cup milk
1 tsp vanilla
2 Tbsp coconut oil (feel free to use butter, vegetable oil or whatever you prefer)
1/2 cup chocolate chips
1/2 cup chopped walnuts (optional)

Hot fudge sauce:
3/4 cup brown sugar
3 Tbsp cocoa powder
1 3/4 cups boiling water

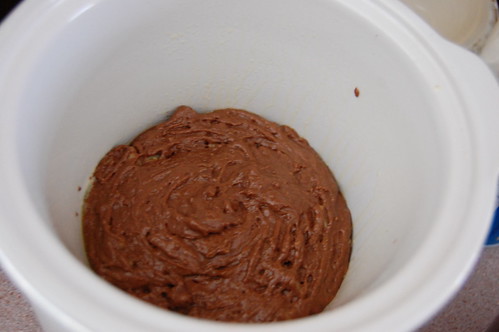
Combine the dry ingredients and then add the milk, vanilla, and oil. Combine well. Fold in the chocolate chips and nuts. Spread the batter in a well-greased 2-quart slow cooker.
hot fudge cake

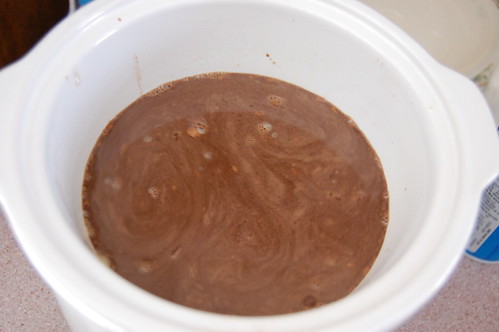
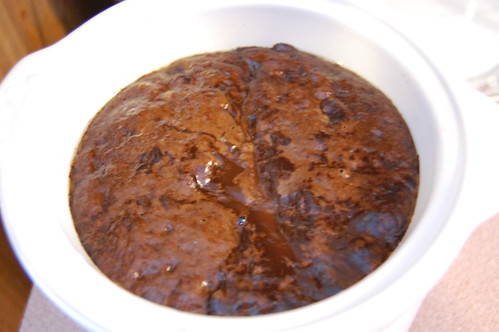
Add the brown sugar and additional cocoa to the boiling water and stir well. Pour this mixture over batter in your Crock Pot. Do not stir. Just leave it alone — trust me.
hot fudge cake

Cook on HIGH for 2 to 3 hours or until a toothpick inserted into the center of the cake comes out clean. See how it rises and all comes together?
hot fudge cake

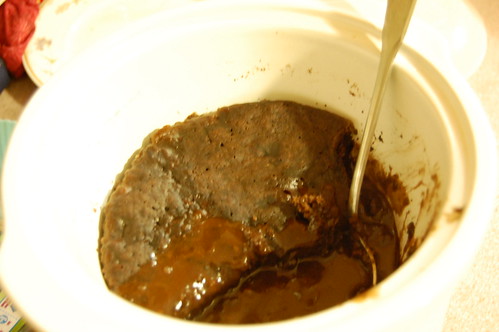
* This recipe makes more of a traditional thick “pudding” — it’s not going to be firm like bakery cake. The water settles to the bottom and makes a chocolatey sauce, and the cake batter kind of rises to the top and gets baked, yet still kind of mushy. Just so you know what to expect. Here’s a photo after we dug into it.
hot fudge cake

** Correct: there are NO EGGS in this recipe.

*** If there are leftovers, they are not great cold — definitely warm extras up in the microwave or in the toaster oven.

I have never cooked this on the LOW setting, so I can’t recommend that. Serve it with ice cream or whipped cream — it is just heaven in a bowl!

Linking up with…

Whatever You Want Wednesday!