Tag Archives: crafts

Tea-Dying and Tote Bag Adorning

DSC_0219

Here’s another craft project I created over the weekend! My mom was visiting (my dad was camping with Drew and the boys at Cub & Partner weekend for Cub Scouts) and I decided to introduce her to the wonder of Hobby Lobby. It’s a good thing the store isn’t that convenient for me to get to, otherwise I’d be in trouble.

We really struck gold with their various clearance sections (and hidden clearance within the aisles). I picked up a black fabric tote for under $3 and a package of 5 doilies for around $3 and immediately had an idea of how I wanted to adorn it. Originally I thought of placing a doily in the corner and spraying bleach. But that was going to be messier than I wanted. Next best thing? Dye the doily to get the antique color I wanted and then just stick it on the bag.

Here’s a quick pic of the doilies before I dyed them:

DSC_0208
First, I dunked the doily in tea and let it sit for a few minutes before hanging it up to dry.

DSC_0209

DSC_0210

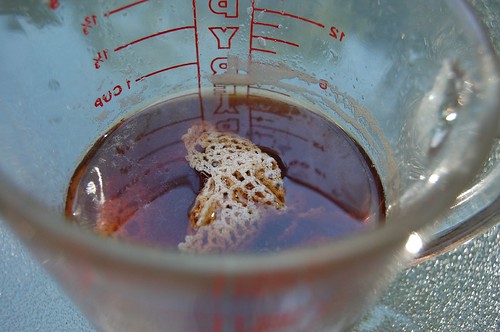
Can you tell that they now look a little aged? Then I gathered my supplies (LOL… told you this was easy).

DSC_0216

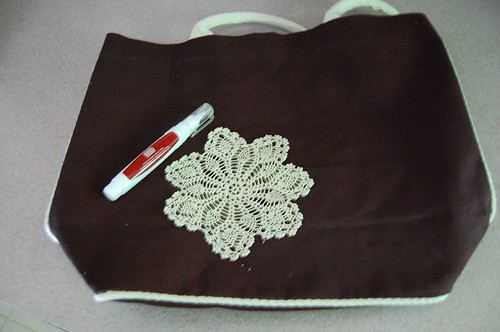
And then I just carefully dotted fabric glue along the back of the doily and then placed in where I wanted it.

DSC_0218

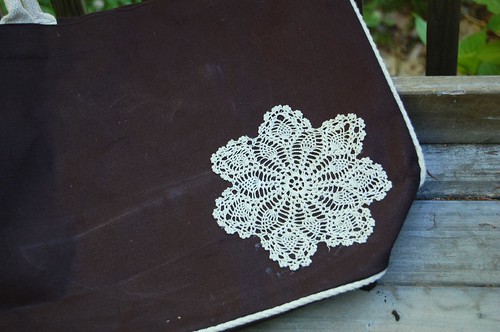
And now I have a roomy black tote bag with a little bit of style! I think that between trips to the lake and the park it’ll see a lot of use this summer.

Ridiculously Easy Initial Wreath

DSC_0212

I have been getting quite a bit of crafting done lately, which has been awesome! It’s a combination of finding just the right items at just the right price, and the fact that Laura is starting to play a little more independently, allowing me bits of time to play 🙂 Last weekend I completed a project I’ve been wanting to do for a long time: make a new wreath for our front door.

I wish we could have a really cool painted front door, but our house is mahogany and stained a reddish-brown. Honestly, there aren’t a lot of colors besides white or cream that look good with it, so it definitely needs a bit of adornment. When I found a big “B” on clearance at Michael’s, I was totally inspired! Then, when I was at Hobby Lobby and I found burlap ribbon, my life was made much easier.

Basically, I took a straw wreath and wrapped it with the burlap ribbon, securing the back with floral greening pins (like these). I carefully positioned my letter so that I could feed ribbon through the top, allowing me to change it with the seasons. Then I hot-glued the letter to the wreath, arranged my silk flowers (hot-glueing when necessary and hoping it will peel off easily when I decide to change up the wreath), and fed the ribbon between the wreath form and the “B” to create the hanger.

And voila! A new wreath that I made in less than an hour (complete with interruptions). The real genius of this wreath, though, is how it is hung. My mom gets all the credit for this idea. Basically, I created a loop at the top of the ribbon (yep, again with my hot glue), and cut a slit for the wreath hanger to slide into. Here are a couple pictures — hopefully they make it clearer.

DSC_0222

DSC_0220

DSC_0223

This way, the ribbons doesn’t get all twisted and you can use one of those inexpensive wreath hangers from the dollar store. So far it’s holding up great! I am sure you could sew the ribbon in addition to glueing it to make it extra secure.

Anyway, I am really happy with the way it turned out and now my front door is a little more welcoming.

{made by dad} glue gun holster

Who has the best dad ever? I do!!! A couple weeks ago I sent my dad a link to this idea that I originally found on Pinterest:

Source: ebay.com via Carol on Pinterest


How genius is that? My dad is quite the woodworker, so I had no doubt he could make this for me, I just didn’t know how many of my mom’s projects he had lined up. But he was actually able to get on this as soon as he read my e-mail 🙂 He made it all from scrap wood. The only thing he had to buy was the tile used to catch stray glue drips.

Glue gun caddy my dad made

I love the storage area for extra glue sticks. Mine are always rolling around in the cabinet where I (used to) keep my glue gun. Not any more — they’re all corralled!

And because my dad is super smart, he added a couple screw eyes and a mini bungee cord (cut to size) to hold everything together when I’m not using it.

I’ve already tested it out with a couple crafts I’ll be posting soon. It is the greatest! Thanks again, Dad!