Spring Wreath

One of my goals for the year was to spend more time on my hobbies. I have always loved crafting. When I was really little and had a subscription to “Highlights” magazine, I remember the arts & crafts section was my favorite! In high school I handmade lots of cards and used to love making those fabric covered photo albums (oh, my goodness, who else remembers those?) Over the years I have enjoyed creating all kinds of things and since taking my current job a few years ago, and balancing it with the kids and everything else that still needs to be done at home, it has been challenging to find a balance, but I think I am finally there!

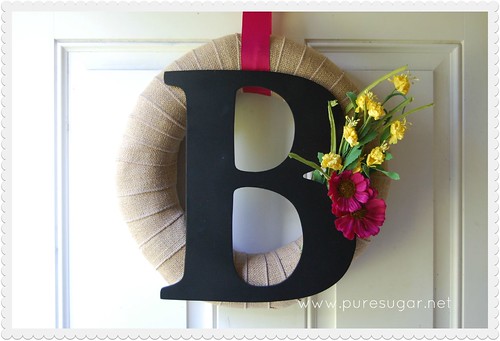
I wanted to make a new wreath for the front door and I was inspired by another crafter in a Dollar Tree Facebook group I belong to. I fell in love with the design and was so happy to find all the supplies at my local store! This afternoon I spent some quality time with my trusty glue gun and within a half-hour or so had this Easter/Spring wreath to hang up. 

With my Spring decorating underway, I now just need the warmer weather to go along with it!

Ridiculously Easy Initial Wreath

DSC_0212

I have been getting quite a bit of crafting done lately, which has been awesome! It’s a combination of finding just the right items at just the right price, and the fact that Laura is starting to play a little more independently, allowing me bits of time to play 🙂 Last weekend I completed a project I’ve been wanting to do for a long time: make a new wreath for our front door.

I wish we could have a really cool painted front door, but our house is mahogany and stained a reddish-brown. Honestly, there aren’t a lot of colors besides white or cream that look good with it, so it definitely needs a bit of adornment. When I found a big “B” on clearance at Michael’s, I was totally inspired! Then, when I was at Hobby Lobby and I found burlap ribbon, my life was made much easier.

Basically, I took a straw wreath and wrapped it with the burlap ribbon, securing the back with floral greening pins (like these). I carefully positioned my letter so that I could feed ribbon through the top, allowing me to change it with the seasons. Then I hot-glued the letter to the wreath, arranged my silk flowers (hot-glueing when necessary and hoping it will peel off easily when I decide to change up the wreath), and fed the ribbon between the wreath form and the “B” to create the hanger.

And voila! A new wreath that I made in less than an hour (complete with interruptions). The real genius of this wreath, though, is how it is hung. My mom gets all the credit for this idea. Basically, I created a loop at the top of the ribbon (yep, again with my hot glue), and cut a slit for the wreath hanger to slide into. Here are a couple pictures — hopefully they make it clearer.

DSC_0222

DSC_0220

DSC_0223

This way, the ribbons doesn’t get all twisted and you can use one of those inexpensive wreath hangers from the dollar store. So far it’s holding up great! I am sure you could sew the ribbon in addition to glueing it to make it extra secure.

Anyway, I am really happy with the way it turned out and now my front door is a little more welcoming.