Recipe | Balsamic Roast Pork Tenderloin

Balsamic Roast Pork Tenderloin

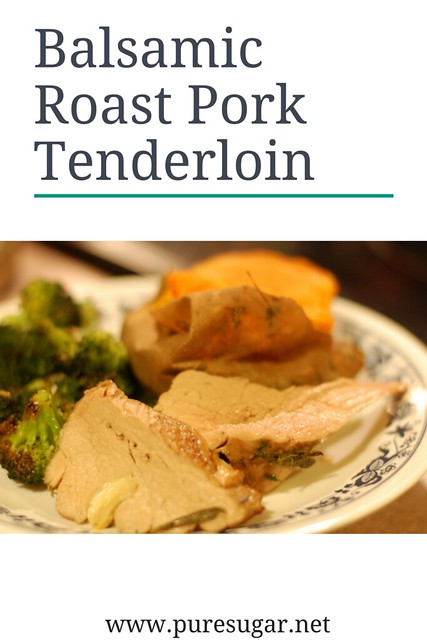
It’s not easy to make a nice Valentine’s Day dinner mid-week, when there is work, school, and activities. But I was determined to do it yesterday. I’ve been looking through old recipes lately and I knew exactly what I wanted to try: balsamic roast pork tenderloins. This is a recipe I made often when Drew and I were first married. I’m not sure why it’s been so long since I prepared it, but I’m happy to say it will be back in the meal rotation.

The recipe is simple (SO simple), and my kids all loved it, too. Laura especially loved the bits of roasted garlic that flavor the pork.

Balsamic Roast Pork Tenderloins

Balsamic roast pork

2  pounds pork tenderloins (1 package with 2 tenderloins)
2 tablespoons balsamic vinegar
2 tablespoons extra-virgin olive oil
4 cloves garlic, cracked
Kosher salt salt and black pepper
2 sprigs fresh rosemary leaves stripped and finely chopped
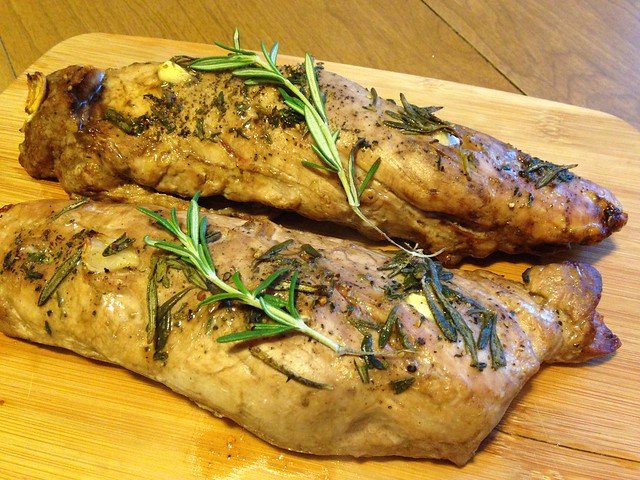
2 sprigs fresh thyme, leaves stripped and finely chopped

Preheat oven to 450 degrees F. Trim silver skin or connective tissue off tenderloins with a very sharp thin knife.

Place tender loins on a nonstick, rimmed cookie sheet. Coat tenderloins in a few tablespoons of balsamic vinegar, rubbing vinegar into meat. Drizzle tenderloins with extra-virgin olive oil, just enough to coat. Cut small slits into meat and disperse chunks of cracked garlic cloves into meat. Combine salt and pepper with rosemary and thyme and rub meat with blend. Roast in hot oven 20 minutes.

Let meat rest, transfer to a carving board, slice and serve.

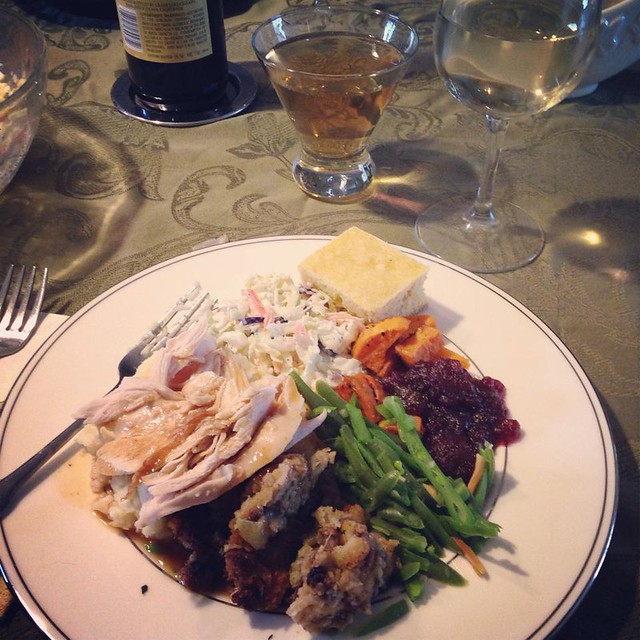
I served this with baked sweet potatoes and lemon-Parmesan roasted broccoli. This dish would be great to prepare for company because you get a fantastic result with very little effort! Enjoy!

Recipe | Babci’s Golumpki

GOLUMPKI

Lately I’ve been seeing a recipe for golumpki casserole floating around the Internet. I was interested in making it, and even had it on my menu. But I decided to make actual golumpkis instead. Truthfully, they’re not hard to do. And even though I was not at the top of my cabbage-rolling game when I make these on Monday, they still held together and tasted delicious (which is obviously the most important part).

After I’d put together a pan of the golumpkis, I still had some of the meat-rice mixture left over, but only teeny tiny little cabbage leaves that were way too small. So in a square Pyrex, I just layered the ingredients — tomato sauce, cabbage, meat-rice, repeat. Call it a lazy girl’s golumpki 😉

Now, this recipe is one that stands out from my childhood. When I was a kid, I’d eat everything except the cabbage, and I’d put a little bit of ketchup on top. Nowadays, I love to eat the cabbage, but you know what? I still put a little ketchup on top too. Don’t knock it ’til you try it! OK, ready to get going on this Polish classic? Since this is a  family recipe without precise measurements, I did the best I could to explain. Just leave a comment if something doesn’t make sense! Luckily, we took photos when my parents and I made them back in November, so hopefully those help as well.

Babci’s Golumpkis

1 lb. meatloaf mix (beef, pork, veal)
1-1.5 c. cooked rice
1 small onion, diced
tomato sauce 
large head of Savoy cabbage
salt & pepper to taste


  • Partially core the cabbage. In a stockpot, boil the head of cabbage in salted water for 10-15 minutes until the cabbage has softened. Do not overcook it. Cabbage leaves that are overcooked will break and will not hold the filling. Drain the cabbage and cool. Carefully separate the leaves without tearing and set aside.
  • To make the filling, cook the meatloaf mix and onion together in a large frying pan until the meat is browned. Drain fat from cooked meat. Add cooked rice and about a 1/2 cup of tomato sauce. 
  • Cover the bottom of a Pyrex baking dish with tomato sauce. Not too much, just so there’s a thin layer
  • With a paring knife, cut down the thick “vein” at the bottom of the cabbage leaf to make it easier to roll. Add aprox. 2 Tbsps. of the filling to a cabbage leaf. To make this easier, you can use a soup ladle to help.

Golumpki preparation

Golumpki preparation

  • Begin to roll up the golumpki, then fold over the side and finish rolling. Place each roll with the seam side down in your baking dish. The rolls should be arranged close together.

Golumpki preparation

  • Pour a little more tomato sauce over the top of all the golumpkis. Cover the top with cabbage leaves.

Golumpki preparation

  • Cover the dish with aluminum foil. Bake at 350 for 1 hr. Enjoy!

Golumpki preparation

Recipe | Savory Tomato Pie

savory tomato pie

Those who have stuck with my blog for a long time may remember that for a while I attempted to keep my recipes in a separate blog I called “Sugar & Spice.” I just never really kept it up, finding it preferable to keep them here instead. Several months ago I finally decided to delete it from my domain, so of course I downloaded all the content. I’ve been going through all the recipes on there, and realized that many of them I have not made in years! One of those recipes is for Tomato Pie.

Well, Jake made his Confirmation on Friday and with family and friends coming to celebrate I wanted to make a meal that would be tasty, but didn’t need to be hot (the Mass was at 5:30 and I knew we wouldn’t be home until close to 7, at which point everyone would be starving). I settled on a menu that couple be prepared ahead of time: London Broil, green bean and feta salad, pasta salad, and I decided to make this tomato pie after remembering that I made pretty much the same meal for his Baptism!

I made three of these pies for 12 people (8 slices per pie), and only 2 slices were leftover! Yes, it was a huge hit and everyone was asking me for the recipe. The best part? It’s very easy, especially if you cheat on the pie crusts like I do. This would be awesome late in the summer when your tomato plants are going crazy – it’s the perfect side dish and you can change up the herbs however you want. 

Savory Tomato Pie

savory tomato pie

1 frozen pie crust, thawed
2 large tomatoes cut into 1/4″ slices
Kosher salt for sprinkling
2 Tbsp. Dijon mustard
2-3 slices deli Swiss cheese
2-3 slices deli Provolone cheese
1 Tbsp. chopped fresh thyme
1 garlic clove, minced
2 Tbsp. olive oil
Additional salt and pepper to taste.
Freshly-grated Romano or Parmesan cheese

Spread the tomato slices evenly on a cookie sheet covered with paper towels or a clean dish towel and sprinkle liberally with salt. Allow the salted tomatoes to set for about 20 min. Meanwhile, bake empty pie crust according to package directions, and remove from oven. 

Turn the oven temperature up to 400 degrees. Spread the mustard over the bottom of the baked pie crust (add more if you need to). Layer the Swiss slices on top of the mustard, than layer the Provolone on top of the Swiss. Layer the tomatoes on top and bake until the pie crust is golden brown and the tomatoes are very soft. (Approx. 35-40 min.)

In a small bowl, combine the minced garlic, thyme, salt, pepper, and olive oil. When you remove the pie from the oven, sprinkle thhis mixture over the top and carefully spread it out using either a pastry brush or the back of a spoon. Top with just a little bit of freshly-grated Romano (my preferance) or Parmesan cheese.

Allow the pie to cool, and serve barely warm or at room temperature.

One pie would be enough for 4-5 people, but just to be safe I’d make two pies because you’re going to want an extra slice or two (plus, the freezer pie crusts always comes 2/pack, so it just makes sense, right?).

{Recipe} Hearty Crock Pot Split Pea Soup

Hearty Crock Pot Split Pea Soup

The holidays are over, but maybe you still have some leftover ham? Or maybe you’re just craving a stick-to-your-ribs soup on a chilly winter day. There’s nothing like a hearty bowl of split pea soup. Over the years, I’ve tried several different recipes, but none of them seemed like “the one.” They were too smoky, or too salty, or just had the wrong flavor.

Desperate to satisfy a craving, I gave one more recipe a shot, adapting it a little bit, and I finally came up with a winner. When your husband exclaims, “This soup is awesome!” and your 6-year-old asks to take to school for lunch the next day, well… you know it’s got to be pretty good.

Hearty Crock Pot Split Pea Soup

1 1/4 cup of dried split peas, picked over and rinsed
4 cups water
2 chicken boullion cubes
1 large carrot, peeled and diced
2 celery ribs, sliced
1/2 medium onion, diced
1 medium potato, peeled and diced
1/2 – 1 lb. of ham, diced
1 bay leaf

Combine all ingredients in a slow cooker and cook on low for 4-6 hours. Check on the soup about halfway through. Add more liquid if necessary. Prior to serving, use a potato masher to mash ingredients slightly and thicken the soup.

Hearty Crock Pot Split Pea Soup

This recipe can easily be doubled, and next time I may have to do that. Top the soup with oyster cracker or croutons, or serve with a buttered roll.

{Recipe} Black Currant Tea Vodka Cordial

Black Currant Tea Vodka

If you are looking for an easy, last-minute gift or something interesting to bring to a holiday party, have I got the recipe for you! A while back I tried a fig tea vodka my friend brewed. It was delicious and I put the idea on my long to-try list. Last month I gave it a shot, and the results were fantastic.

First, let me give you the recipe.

Black Currant Tea Vodka Cordial

12 oz. of vodka
1 silk sachet of Harney & Sons Black Currant tea
1 oz. (or more to taste) simple syrup

Pour the vodka in a mason jar and add the sachet. Cover and allow to steep for 8-10 hours. Remove sachet and dispose. Add simple syrup to your desired sweetness. Store in a cool, dry place (I prefer the freezer).

Black Currant Tea Vodka

First, a note on the vodka…

While you don’t have to use your Stoli or Grey Goose for this recipe, I would not recommend anything too harsh. Sobieski is my go-to vodka. First, because it’s Polish, and second because I think it’s good quality for a reasonable price.

Second, notes on the tea…

I think it’s really important to use a high-quality tea when making this flavored vodka. You will definitely notice a difference between a cordial made with good ingredients vs. one made with cheap ingredients. That being said, Harney is one of my favorites and I don’t think their prices are crazy. Are they a little pricer than some of the grocery store brands? Yes, but trust me — it’s so worth it. And you don’t have to mail-order them anymore. I’ve seen the sachets at Target and Stop & Shop. That brings us to why I prefer using the tea sachet. I find that the sachet allows you to brew more than just a single cup, so it’s perfect for a “pint-ish” of vodka. I’ve also used the sachet with 8 oz. of vodka and it worked fine, too. I’ve never tried this with loose tea, though I’m sure you could do it. You’ll just have to strain everything out.

Feel free to experiment with other flavors of tea, too. I’ve also made tea infused vodka using Hot Cinnamon Spice and that was really yummy.

Na Zdrowie!

Thanksgiving 2014

thankgiving 2014

I hope you all had a wonderful Thanksgiving! Here in the Northeast, it was rather eventful… the first major snowstorm of the season hit, complete with travel tie-ups and serious power outages. The snow started on Wednesday morning, and as I suspected, the library opted to close so I didn’t have to go in to work. Drew’s mom and aunt came up in the morning, as well, in order to stay ahead of the storm.

thankgiving 2014

For most of the day we watched the snow fall. (We ended up getting close to a foot!) The kids were excited and built a snow man and snow fort in the afternoon. We had all just settled in to start a movie before dinner when everything went silent. Yes, the wet, heavy snow (or an accident… or who even knows) caused the power to go out. At first we were hopeful it was temporary, but soon we realized that we wouldn’t be able to use the oven to make dinner. So while I was gathering candles and oil lamps, Drew got out the propane grill and camp stove so we could get everyone fed.

Outages were widespread and I began to get worried about what would happen for Thanksgiving. Would I be able to cook? We came up with a plan B, just in case. Luckily, the mashed potatoes and stuffing were already made. We could easily warm those on the wood stove. We figued we could cut up the turkey and cook it in the Dutch oven outside if we had to. We all went to bed, not knowing what to expect in the morning. Luckily, our power came back around 1 AM. I was incredibly thankful! Some people in the area are still without power.

Thanksgiving day was very nice. I was able to cook the traditional dinner after all — no fire pit cooking was necessary! I think everyone enjoyed the meal — we were sure full! I made roast turkey, sour cream mashed potatoes, green beans with slivered almonds, roasted sweet potatoes, roasted brussels sprouts, cornbread, and cranberry sauce. My mother-in-law brought the cranberry-sausage stuffing. For dessert we had apple crisp — simple, and just enough!

thankgiving 2014

After the dishes we washed, and turkey bones were simmering to make stock, the kids and Drew’s mom played board games for a while. I did a bit of crochet, and Drew started to put up the Christmas tree. I think we’ll decorate it tonight.

thankgiving 2014

Today I did some more cleaning, and I’m just taking it easy. No shopping for me today! There’s nothing I really need and I just don’t have the patience to deal with the crowds. I used to always enjoy going out on Black Friday, but in recent years it has gotten way too crazy. Nope, not for me anymore. I think I’ll spend the rest of my day off working on craft projects and making some turkey soup for dinner. Some down-time in front of the fire seems pretty perfect to me!

Influenster #VitaVoxBox

#vitavoxbox from Influenster

Is there anything better than opening your mailbox and instead of seeing bills and junk mail, finding a package full of goodies to try out? I think not! I was super excited to be chosen to receive the #VitaVoxBox from Influenster and over the last couple of weeks I’ve been trying out all the goodies.

In case you missed my unboxing video on YouTube, here it is:

I have to say, I was most excited about the First Degree burn cream. I’m a klutz, and I often work around hot things (the oven, stove, my glue gun… you get the picture). I had the opportunity to give the First Degree cream a try the other day when I was making hair bows for Laura. Like a fool, in order to see if my glue gun was hot, I touched the metal part. (It was late, I was tired, and obviously not thinking). Immediately I put a dab of the cream on my finger, massaged it in, and felt some relief. Good stuff!

The SoftLips Cube is OK. Honestly, I am not a big fan of SoftLips products, and I have never tried one of these cube-type of lip balms before. It smells and tastes wonderful, though! And since my five-year-old always wants to share my “lipstick,” the cube works out great because there is nothing to roll up or down or make a big mess. So it gets a thumbs-up from me for those features.

Playtex Sport FreshBalance tampons. What can you really say about tampons? They work well, though I find them a little too scented.

Bikini-Ready Gummy Vitamins were an interesting product. It’s hard to say much about them because it was a one-shot sample, but they tasted like candy (though there was an odd aftertaste) and definitely gave me an energy boost.

The Pure Leaf sweet tea was tasty. I will give some of their other flavors a try.

And finally… the Elizabeth Arden Flawless Future serum. I haven’t tried this out yet, but I plan to this weekend. I’ve been neglecting my skin care routine in general, so one of my goals now that school is back in session is get back into a daily regimine.

So there you have it! have you received any Influester #VoxBoxes? If you’re interested in signing up, email me and I will send you an invitation! It’s so fun. You write some reviews, take some surveys, and get to try out products.

FTC: These products were sent to me compliments of Influenster for testing and review purposes. All opinions are my own.

{Recipe} Marinated Butter Beans for your Antipasto Platter

Marinated butter beans

When we have parties, my favorite appetizer to prepare is an antipasto platter — delicious savory treats, piled high on a platter, and shared family style. Add some crostini or baguette to soak up the vinegar and oil from the various foods and you’ve got a treat that will please everyone. The time may be over for summer BBQs, but as the holidays approach, so will entertaining opportunities!

My typical antipasto platter includes cured meat (usually pepperoni or salami), fresh mozzarella, olives, roasted red peppers, maybe some artichokes or pickled asparagus… really, whatever I have on hand. Last month I got the idea of using beans on the antipasto tray I prepared for the boys’ birthday party. Not sure how or why that popped into my head (possibly they were talking about a bean salad on an NPR program about picnic foods that I was listening to as I drove). I threw this recipe together for Marinated Butter Beans and they were a huge hit! Not only were they delicious on their own, but they added zing to a tossed salad and bulked up a pasta salad, too. You may have seen marinated butter beans at the deli case or in the “olive bar” area of your grocery store, but why pay those prices when you can make it yourself for a whole lot less? 

Marinated Butter Beans
A tasty addition to your antipasto tray
Write a review
Print
Ingredients
  1. 1 15-oz. can of butter beans
  2. 1/4 c. olive oil
  3. 3 Tbsp. red wine vinegar
  4. 1 tsp. capers
  5. 1 Tbsp. minced onion (not dried)
  6. 1 tsp. diced red pepper
  7. 1/2 tsp. Italian seasoning
  8. pinch of salt
Instructions
  1. In the bottom of a mason jar or a bowl, combine olive oil, vinegar, capers, onion, red pepper, Italian seasoning, and salt. Drain butter beans and rinse well. Add beans to the jar and stir to coat. Refrigerate the beans for at least a few hours, or better yet, overnight.
Notes
  1. Add to your antipasto platter, salad, or just enjoy as a snack.
Pure Sugar http://www.puresugar.net/

For more yummy recipes, head over to Diary of a Stay at Home Mom for Cooking Thursday!

Nine is Fine!

Happy birthday, Noah!

Yes, August is a crazy birthday month for us. There’s my mom, Drew’s mom, Drew’s brother, Jake of course, and Noah. Yesterday was Noah’s special day — he turned 9!

Our weekend was full of celebrating. Saturday evening the boys had some of their friends over for a LEGO-themed party. Drew did all the work for this one — I can’t take any credit at all. The kids played LEGO games, built LEGOs, and designed their own mini-figures.

Birthday Party

Birthday Party

For the food, I made pizzas that resembled LEGO bricks, along with hot dogs, chips, and veggies. It was simple, but the kids all liked it!

Birthday Party

Birthday Party

We ended the evening by showing “The Lego Movie” on the outdoor screen. Some of the boys’ parents and siblings also came for that — such fun!

Yesterday we had our family party and that was a great time, too. Again, the food was pretty simple, but sometimes that’s the best. I made a tray of sausage & peppers, a tray of meatballs in marinara, pasta salad with artichokes and sun-dried tomatoes, rolls, and salad. We’ve been enjoying the leftovers 🙂

Birthday Party

Today has just been getting the house back in order after a weekend of parties. Dishes, laundry, putting away gifts… My allergies have been crazy today so I took a Benedryl and that wiped me out!

Tonight I plan to watch a movie with Drew and Jake after Laura is in bed (Noah’s at his grandma’s for a couple days), and doing a little crochet. Now that I’m halfway done with my afghan I’m getting itchy to start a new project, but I won’t. I’m going to finish this one up, border and all!

Well, time to get Laura’s bedtime routine going… hope you had a great Monday!

{Recipe} Indian-Spiced Chicken Burgers with Cumin-Yogurt Sauce

Indian Spiced Chicken Burgers

The summer is winding down, but there is still plenty of time to grill up a great burger! While I love a big, meaty cheeseburger, sometimes it’s fun to change things up a bit. Today I’m sharing with you a recipe for chicken burgers with an Indian twist. Don’t skip making the Cumin-Yogurt sauce — it’s what really makes the burgers stand out!

Indian Spiced Chicken Burgers with Cumin-Yogurt Sauce
A delicious alternative to traditional burgers
Write a review
Print
Burgers
  1. 1 package of ground chicken breast (approx. 1 lb.)
  2. 4 scallions, thinly sliced
  3. 2 jalapenos, seeded and diced
  4. 2-inch piece of fresh ginger, peeled and grated
  5. 2 Tbsp. freshly squeezed lemon juice (from 1 lemon)
  6. 1/2 tsp. red chili powder
  7. 1/2 tsp. ground cumin
  8. 1/4 tsp. ground turmeric
  9. 1 Tbsp. ground coriander
  10. salt and pepper
  11. mini pitas
  12. chopped onions and tomato
Cumin-yogurt sauce
  1. 1/2 cup plain low-fat yogurt
  2. 1/2 tsp. ground cumin
  3. handful of chopped cilantro
  4. salt and pepper
Instructions
  1. Prepare the cumin-yogurt sauce first by combining the yogurt, cumin, and cilantro in a bowl. Add salt and pepper to taste. Set aside to allow the flavors to intensify.
For the chicken burgers
  1. Combine the ground chicken, scallions, jalapenos, ginger, lemon juice, chili powder, cumin, turmeric, coriander, salt, and pepper in a medium bowl. Stir everything together really well then let the mixture sit for about 10 minutes.
  2. Gently form burger patties. I made mine more oblong in shape to better fit inside the pitas. Season the patties with a little salt and pepper if you desire and then grill until the ground chicken is opaque throughout the burger. Do NOT undercook the burgers.
  3. Cut four pitas in half and warm them either on the top rack of your grill or in a toaster oven. Don’t overheat them or else they’ll get too crispy. Place two patties in each pita half along with diced onion and tomato. Add a healthy dollop of the cumin yogurt sauce and serve.
Notes
  1. You can grill these outdoors, but they also are delicious broiled or cooked in a frying pan. Use whatever method is most convenient for you.
Pure Sugar http://www.puresugar.net/

 I’m linking up with Sandra at Diary of a SAHM

because it’s Cooking Thursday!
Photobucket