gluten-free peanut butter banana brownies

gluten-free peanut butter banana brownie

Last week I was craving something cakey. And chocolaty, but that goes without saying. Naturally, I headed over to Pinterest for a little inspiration and decided to try this Paleo mug cake recipe from The Wannabe Chef. It was delicious! Honestly, it was the first mug cake that I ever truly enjoyed. The only problem is that it was too much cake. So I set about to tweak it a little to my liking and to better feed a family of 5.

This recipe makes a standard-sized pan of gluten-free brownies. The best part? It doesn’t require any exotic specialty flours — I think most people have all these ingredients in their pantries right now! While you can certainly mix everything up by hand, I highly recommend using a food processor. It makes the batter silky smooth and as someone sensitive to texture, I think chunks of banana would ruin this recipe for me. (Just make sure you cover that opening with your hand because the cocoa powder flies everywhere!

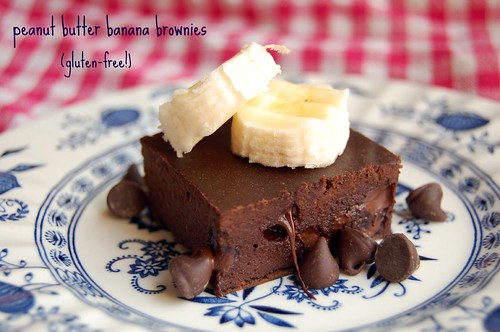
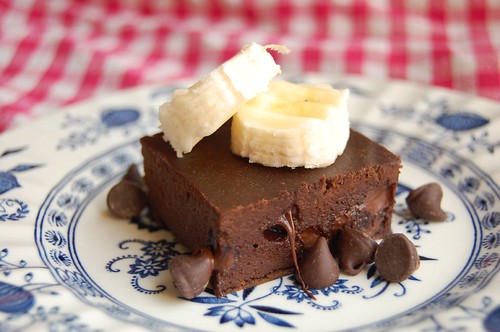
Gluten-free Peanut Butter Banana Brownies

gluten-free peanut butter banana brownie
Ingredients:

3 medium bananas
3 large eggs
1/3 c. smooth peanut butter
6 Tbsp. cocoa powder
3 packets of stevia *
1/2 c. chocolate morsels *

Method:

Pre-heat oven to 350 degrees. Combine bananas, eggs, peanut butter, cocoa powder, and stevia in the bowl of a food processor. Combine until smooth (be sure to periodically scrape down the sides). Pour batter into a buttered 8×8 baking dish. Sprinkle chocolate chips over the top and gently mix them in. Bake for 30 minutes. Cool.

Yield: 16 servings

* These are both optional ingredients, but I like the extra sweetness they deliver. You could could use fewer chocolate morsels to cut down on the sugar.

As prepared here, there are about 97 calories per serving and 10.4 grams of carbs.

So there you have it! A delicious, guilt-free, grain-free, gluten-free, dairy-free (if you omit the chocolate morsels) treat that is chock-full of healthy fats and protein (and potassium). You can certainly substitute another nut butter for the peanut butter and I’m sure it would be just as good!

countdown to 2012: desserts


 Countdown to 2011 with Finding Joy in My Kitchen

This week I am counting down to 2012 with SnoWhite from Finding Joy in My Kitchen. She is inviting readers to join in the fun by sharing their very best recipes of 2011. Today’s theme is desserts. This recipe for Sour Patch Grapes is a fun, light dessert when you don’t want anything too heavy.

It also makes a great snack and it’s a wonderful addition to any kind of potluck. I brought these to my son’s Pinewood Derby and they were a hit. I had to laugh every time someone asked me for the recipe because they are so simple and you could even put your kids to work making these.

Sour Patch Grapes (a.k.a. Glitter Grapes)

glitter grapes

Sugar Cookie Cake

Sugar Cookie Cake

For some reason I cannot make a decent sugar cookie to save my life, and that’s when I turn to this recipe. It’s yummy with whipped cream (OK, I used Cool Whip — sue me) and berries, it’s awesome with some lemon curd spread on top, and I want to make a raspberry sauce to drizzle on top before the cake is all gone. You could add chocolate or toffee chips, cinnamon, heck even blueberries in the batter would probably be amazing. It’s one versatile little cake and I hope you enjoy the recipe as much as we do!

Sugar Cookie Cake

3/4 c. cold butter
3 c. flour
1 1/2 c. buttermilk *
2 eggs, beaten
1 tsp. vanilla
2 c. sugar
1 tsp. baking soda

Preheat oven to 350 degrees. In a large bowl, mix butter, sugar, and flour into crumbs. Reserve 1 cup of crumbs. Add 1 tsp. of baking soda to the buttermilk, and then add this to the rest of the crumbs. Add in the eggs and vanilla; mix well and pour into a greased 9×13″ pan. Top with the 1 cup reserved crumbs.

Bake at 350 for 35-40 minutes (or until cake tester comes out clean).

I find that this cake tastes best warm, so if you’re not eating it straight from the oven, just warm it for about 20-30 seconds in the microwave.

* I rarely have buttermilk on hand. As a substitution for use in this recipe, add 1 1/2 Tbsp. of lemon juice or white vinegar to a measuring cup and then fill it until the 1 1/2 cups mark. I’ve used both types of acid with successful results, so use what you have on hand.

{Recipe} No-Bake Easter Nest Cookies

Easter Nests

With Easter just on the way, I thought I’d share my favorite Easter cookie recipe with you. My good friend Kelly used to always bring back some of these delicious cookies after Easter break and we’d enjoy them with a cup of tea as we watched TV in our dorm room. They’re great to make with kids, too because it’s a no-bake recipe (and it’s messy, so naturally it’s fun!). Be sure to store extras in your refrigerator, otherwise the marshmallow will get too melty and goopy.

I hope you enjoy!

No-Bake Easter Nest Cookies
Write a review
Print
Ingredients
  1. 7 oz. marshmallow fluff
  2. 1/4 c. creamy peanut butter
  3. 2 Tbsp. butter, melted
  4. 5 oz. chow mein noodles
  5. 1 cup chopped M&Ms
  6. Peanut M&Ms, Cadbury mini-eggs, or jellybeans
  7. Powdered sugar (optional)
Instructions
  1. Combine marshmallow fluff, peanut butter, melted butter. Mix until well blended. Add noodles, chopped M&Ms. Drop by rounded teaspoons onto greased cookie sheet and shape to form nests. Let stand until firm. Dust bottom with powdered sugar (optional). Fill with peanut M&Ms, Cadbury mini-eggs, Robin's Eggs (malted milk candies) or jellybeans.
Pure Sugar http://www.puresugar.net/