{Tutorial} Sew Easy Loopy Scarf

Loopy Scarf Tutorial

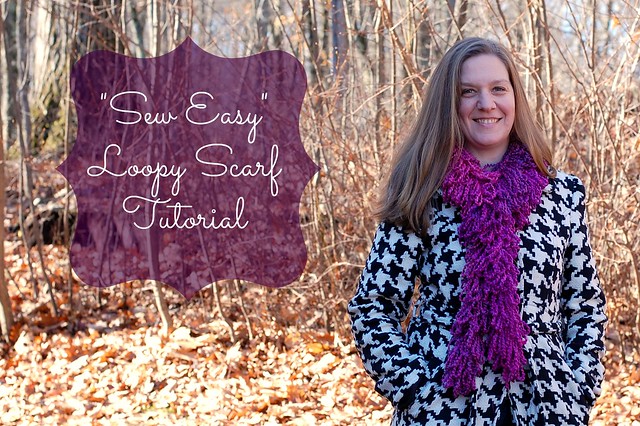
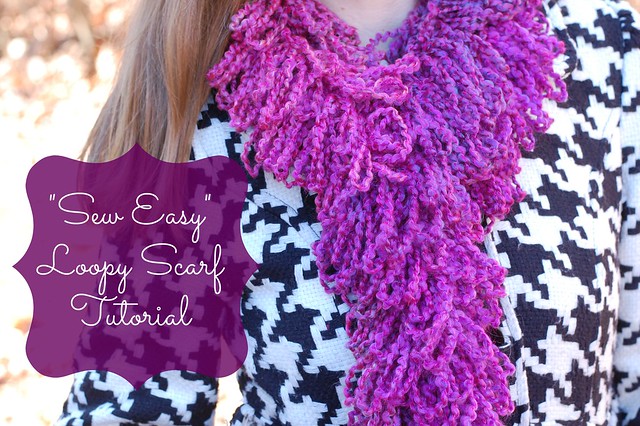
It’s been a couple years now since I made my first loopy scarf, but I still enjoy creating them and if you’re looking for a last-minute handmade gift, this is perfect! One scarf takes about an hour to complete from start to finish (maybe a little more for your first one). The best part is that you don’t need to know how to knit or crochet. Yes, it’s true — you really can make a funky handmade scarf without those skills, as long as you have a sewing machine. Grab a drink, put on a movie, and let’s get crafting! 

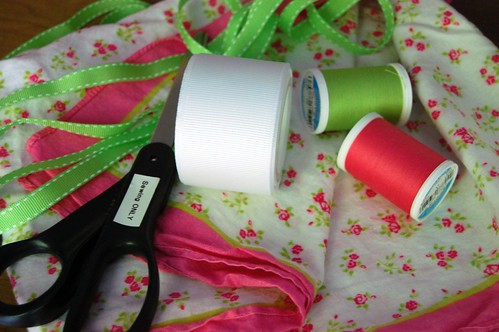
Here’s what you’ll need:
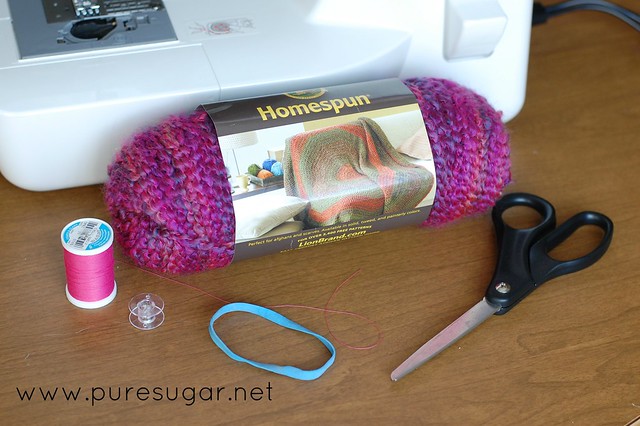
 
Loopy Scarf Tutorial

  • A sewing machine
  • One skein of Homespun yarn (or a similar bulky yarn)
  • Coordinating thread
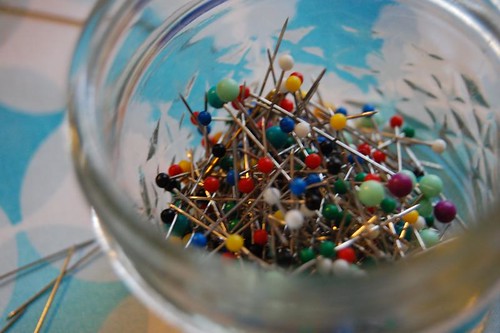
  • Basic sewing notions

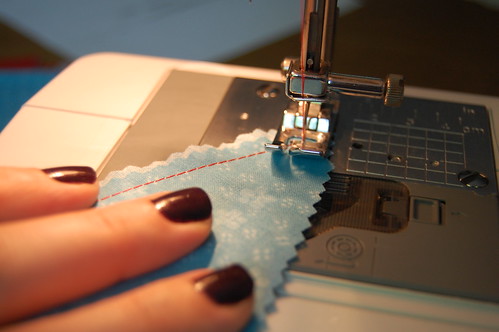
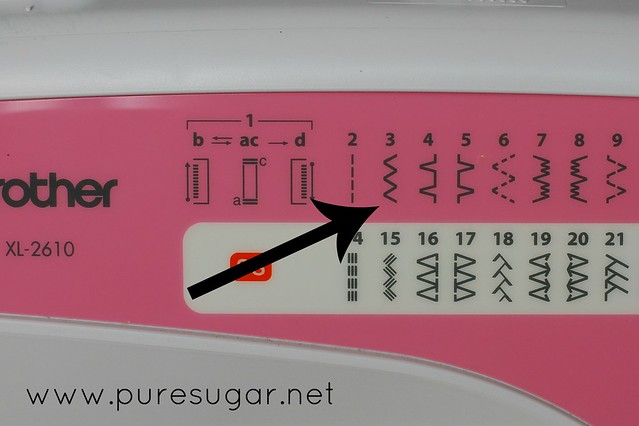
Set your sewing machine to a zig-zag stitch. Adjust so that the stitch is somewhat narrow.

Loopy Scarf Tutorial

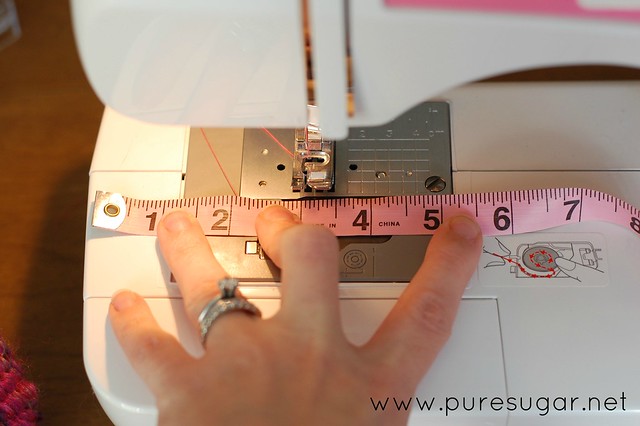
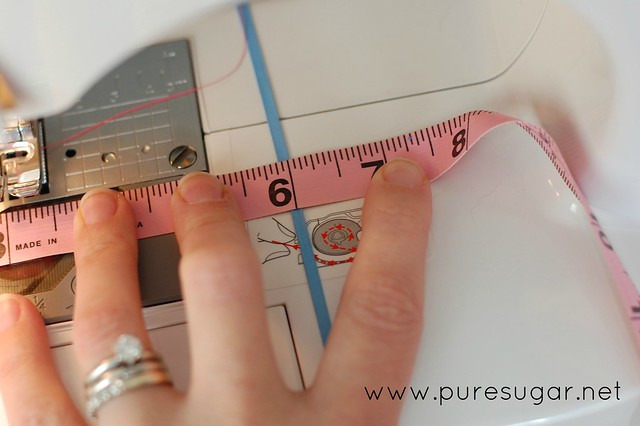
Next, decide how wide you want the scarf. My prefernce is approximately six inches wide, mostly because that width makes the looping easy.  There are about three inches on the left and I use a rubber band to mark three inches to the right (for a total of six inches).

Loopy Scarf Tutorial

Loopy Scarf Tutorial

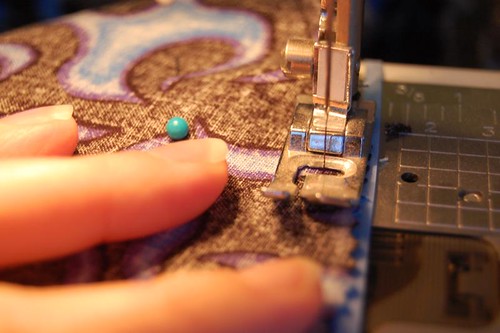
Now you’re ready to start looping! Holding the end of the yarn, make “loops” going from one side to to the other. Keep doing this this until you have about 1.5-2 inches “looped” and then carefully move up the yarn so that it’s under your needle. Slowly start sewing (let me stress the importance of going slow when working on this scarf), being sure to backstitch at the beginning. Try to get the yarn strands really close to each other, but don’t bunch them up into a pile.

Loopy Scarf Tutorial

Loopy Scarf Tutorial

Loopy Scarf Tutorial

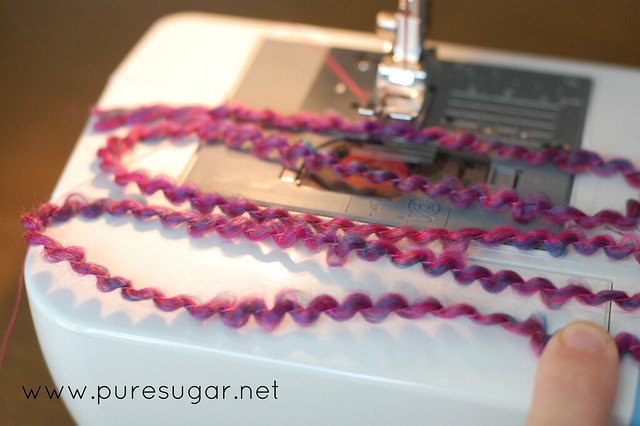
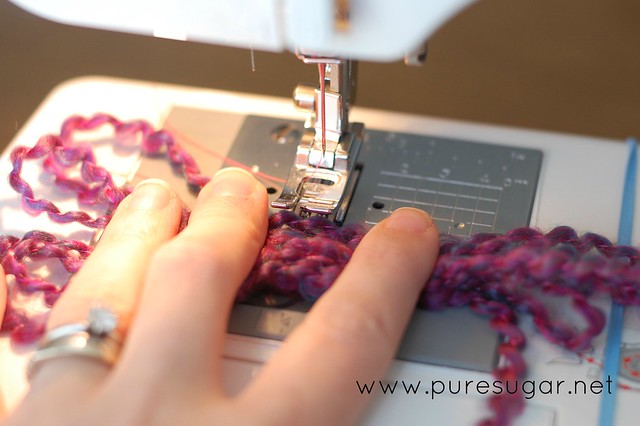
When you finish sewing together the first few loops, make sure to leave your needle down to secure the yarn while you continue making loops. Repeat this process until the scarf is as long as you’d like!

Loopy Scarf Tutorial

Just in case the directions aren’t clear from the photos, here’s a short video that explains how to sew the scarf together.

Hopefully that will clear up any questions. As you sew, you’ll see that your scarf appears flat as it comes out the other end of your machine. Once you’re done, you’ll just fluff out the scarf and voila! You have no-knit, no-crochet scarf that sews up in no time. 

Loopy Scarf Tutorial


 This project was originally featured as a guest post on Sugar Bee Crafts.

Experiments in Millinery

DSC_0245

I know, I know… I’ve already blown the write-every-day-for-a-month thing. Would it excuse me if I told you I was under the weather for two days and then had a totally crazy busy weekend? No? Ah well… I understand 😉 Well, let’s start again, shall we?

My littlest is spending a couple days with Grandma, which has given me time to get a ton done. Yesterday was cleaning/shopping. Today is crafting. Topping the list? A new welding beanie for my dad. Yes, my dad welds. I know, I am lucky to have my own personal welder 🙂

DSC_0242

I have been trying for well over a year to figure out a welding cap pattern that fits him correctly. This really shouldn’t be hard! A while back he gave me an old hat that had been worn through, so I took it apart to see exactly how it was constructed and I made my own pattern from it.

DSC_0243

After a couple cups of coffee, and quite a bit of cursing, I think I got it. Now, let’s just hope it fits!

DSC_0247
Ta-da!

easter softie decoration

I didn’t do much Spring or Easter decorating this year. Terrible, I know. But sometimes the idea of dragging out the boxes, putting out the stuff, and just having to pack it all back up in a few weeks seems like too much effort. But I felt like I should do something.

I had collected a few ideas on my Pinterest boards, and for my inspiration I used these fabric carrots from The Ballard Bunch and these other fabric carrots from Clare’s Craftroom. This is what I came up with:

DSC_0124

I’m pretty happy with them, though I don’t think I like the fabric I used to tie the three together. It’s just what I grabbed. Maybe a need a small bow around the top of each individual carrot, too. What do you think?

The carrots were easy enough to make. I just cut long triangles from three different fat quarters and sewed up the side. I sewed a casing at the top, stuffed the carrots with Polyfill, and then cinched the opening together with crochet thread. For the leaves, I used my trusty hot glue gun and some green ribbon. I just made loops that looked about right. I glued the sides of the center loop to each adjoining loop in order to get them to stand up a little bit.

Super easy project and now at least I feel like I did a little something for the holiday!

getting serious about sewing

Photobucket

I’ll be honest with you. I’m a fly-by-the-seat-of-my-pants kind of gal when it comes to, well, pretty much anything. Take a class? Pfft. Yeah, right. I tend to just dive in and start something new. Most of the time this has worked in my favor. Knitting and crochet were both successes, but I’m having a little more trouble with sewing. Time to get serious.

Of course, I’m still not taking a class, but I did buy this book called Stitch by Stitch: Learning to Sew, One Project at a Time by Deborah Moebes and I plan to sew my way through it, one project at a time. I also considered 1, 2, 3 Sew: Build Your Skills with 33 Simple Sewing Projects by Ellen Luckett Baker but the projects didn’t seem as interesting. I mean, I can sew napkins, placements, pillowcase dresses, that kind of stuff. But the Moebes book seemed to go a little further. The final project is a cap sleeve blouse, and honestly that was the clincher. I’m really excited to get it!

Anyone have any other favorite sewing books they’d like to recommend? The first book I bought was Bend the Rules Sewing by Amy Karol and I still love that book!

skirting the issue

new skirt


With spring coming, I wanted to finally get around to sewing up some skirts for Laura. I wanted to do this last year, but never actually got around to it, even though I bought the fabric! Yesterday I had extra time in the afternoon so I figured I’d give it a whirl.

I used this simple skirt tutorial from MADE, a fabric remnant I had in my stash, and apparently the wrong bobbin for my machine (I’ll get to that later). Anyway, it really is a simple project. The ironing is the most difficult part of the whole thing! Laura was very excited about it. She immediately put it on over her pants and started running around the house like a crazy girl. You’d think she required a Duracell procell battery or something, but no… She just has a lot of energy!

Now, the bobbin story. As I sewed I noticed that the bottom thread wasn’t sewing a nice line. It was all loose and messy. When I checked my manual, I realized that I’m supposed to use a specific type of bobbin for my machine. Of course. And the bobbins I had been using were just generic bobbins. Of course. That might have something to do with my “bird-nesting” problems as well. So I ordered the correct bobbins, and today I am going to clean the machine and change the needle (because I have never done that, either), and hopefully that will take care of the problem!

But if you’re looking for a cute and quick little girl’s skirt – I recommend this tutorial to get yourself going!


best headband ever

DSC_0018

I am showing my Massachusetts roots when I say this: It’s been wicked freaking hot out. I am not a big fan of humidity, especially with my long hair. Normally, I would throw it back into a ponytail, or twist it into a bun. However, my daughter freaks out when my hair is up for some reason.

As long as my hair is down in back, she’s happy. But the minute I put it up, Laura furrow her little two-year-old eyebrows and says, “Mommy fix hair! Mommy fix hair!” She says it over and over until I take out the twisty pins or elastic. And with temperatures in the 90s and bangs that are growing out and hair halfway down my back, I need to keep it away from my eyes and behind my ears at the very least. So I needed another solution: headbands. Pinterest to the rescue! I found several great (free!) tutorials to make cute headbands and first decided to sew up a few using this tutorial from Happy Together.

This is a great project for all those fat quarters one tends to buy just because one likes the pattern. 😉 They are quick and easy to make and stay in your hair very well. I’ve been wearing mine constantly! I even got brave and decided to model one of them. Please ignore my grubby tee and my lack of makeup. It was about a zillion degrees out when I took these photos.

DSC_0020 DSC_0022

DSC_0027 DSC_0028

These headbands reminded me of what Sassy magazine dubbed “Alice Bands” back in the early 90s (referring, of course, to Alice in Wonderland). Do you remember that trend with the thick headbands? I always liked it, so I’m glad it’s kind of back. You can obviously make these headbands as funky or plain as you like. I’d recommend giving the pattern a go!

bandana dress

DSC_0255

I have so many sewing and craft projects in my “to do” pile, that I get dizzy thinking about them. But since I had the luxury of kid-free time today, I thought I’d tackle one that promised to be quick: the bandana dress.

bandana dress (to be)

I’ve read tutorials for bandana dresses and pillowcase dresses and honestly, I think the end product looks pretty much the same, but since the bandana version did not require any cutting, I went with this tutorial from Trey and Lucy. And yes, it was every bit as easy as she makes it sound! I spend more time fussing with the ribbon and getting the bows just right. Truth be told, I would prefer to have lime green ribbon, but white was the only thing in my stash that matched. I can easily switch it out later. Also, I think the 1.5-inch ribbon is a little overwhelming. I’ll have to see it on Laura. The next one (because there will be a next one, oh yes!) will use narrower ribbon.

The cool thing about this dress is that you don’t really have to use bandanas. Just cut fabric you like to the size of a bandana (well, I suppose you’ll want to sew back the raw edges, but you know what I mean. I can’t wait to make these using holiday or seasonal fabric. I think this type of dress will look really cute over a turtleneck in the winter!


bandana dress

And, of course, I’ll have to make a hair bow to match 🙂

red and blue vintage circus bunting tutorial (sort of)

fabric bunting

Yesterday I completed the one project I wasn’t sure I’d complete in time for Laura’s birthday party — a fabric pennant/bunting/whatever you want to call it. These have been all over the web for a while now, and on my “to do” list since spring. I kind of made up the instructions as I went along. All I knew was it had to meet these requirements:

  • Easy to do. I do not have the time right now to be all fussy with things like this.
  • Look old and vintage-y. Fraying? No problem. Uneven lines? Hey, that’s okay! It just makes it look more handmade.
  • Be multi-purpose. I need to use this for more than just one event.

So, the color scheme I’m using, as you know, is turquoise and red. Well, it’s lapsed into various shades of blue and red which is perfect since the party is also Memorial Day weekend. I will be able to use this bunting for years on the 4th of July as well, so I will definitely get a lot of use out of it.

First, I chose my fabrics. I just bought a bunch of fat quarters in patterns that I liked. Then I ironed them flat, then folded each in half the long way (with right sides facing each other) and ironed it again. I used this template from Cicada Daydream to trace triangles on the wrong side of the fabric. Because I wasn’t going to be turning my triangles inside-out, I cut out my triangle pattern on the dotted (sew) line. I used pinking shears because I like that look. It looks old. It also makes me think of my grandmother 🙂 Then, I sewed a straight stitch around the two long sides of each triangle. I didn’t go across the top.

fabric bunting

Then I took some navy blue bias tape that I had in my stash, snugged a triangle up inside, and sewed it. Repeat until you run out of triangles or the bunting is as long as you want it. And let me warn you: if you decide to have a little glass of Tia Maria and milk while you sew up your second bunting, chances are you will mess up a few triangles and then your husband will ask why you’re cursing so much. 😉

In hindsight, a smarter thing to do would have been to take fabric glue (personally, I like Fabri-Tac) and glue each triangle into place on the bias tape, and then sew one single line across. It would look a lot neater and save some time. But I’m still happy with the way this came out. I’ll be sure to take a photo of it “in action” at the party on Sunday!

a gift for “somebunny” special

DSC_0323

If there was a Slacker Auntie award, I would definitely receive it. I have a box of Easter goodies for my niece sitting on the dining room table, and I have yet to mail them. But before Easter is out of everyone’s mind, I just wanted to share the shirt I made for my sweet little E.

Lisanne had e-mailed me a link to this tutorial from Girl. Inspired. I thought it was such a cute (and relatively easy!) project and I just had to make one. So I did! This was my first time sewing on a appliqué and I was kind of impressed with myself because I did alright around all those curves!

DSC_0321

Laura was very upset that the shirt was not for her, so I think I need to make another one. I also made a coordinating headband. My niece is 17 months old and probably will take it off immediately, but I couldn’t resist. I love when things are all matchy-matchy.

DSC_0325

And yes, I know it still looks like the middle of winter out there in my yard. My forsythias look awful, the stupid deer ate all my tulips, and the trees are just barely (finally) developing buds. But that has nothing to do with anything, really.

So this will be on its way either today or tomorrow (the car seat is in the car Drew took to work — see? I am totally disorganized this month!). I hope she likes it!

spring sewing

spring sewing

Spring is in the air (finally!). That means it’s time to put away the le creuset braiser in favor of the grill, trade in my clogs for flip-flops, and switch out the wool for some delicious fabric. This week Joann’s has it’s “Daffodil Days” sale going on and the prices on fabric are so good! With 50% off their red-tag clearance fabric, I just could not resist going a little crazy. (And the week’s not over yet 😉 )

I do have projects in mind for most of this. With the blue and white fabric, I’m making a cover for Drew’s electric piano. With the blue and yellow polka-dot fabric, I’m making matching skirts for Lulu and her cousin. I’ll probably also make skirts from the other polka-dot fabric and maybe that patchwork fabric, too. (I should have bought more of that one — I love it.)

I’m not sure about the brown, yellow, and orange floral. Honestly, I don’t love it as much as in the store, but now I have two yards of it. Maybe it’ll make a cute pillowcase-type dress towards the fall? If nothing else, I can always make some kind of stuffed animal with it, I suppose. Might be cute for an owl.

What craft projects are you guys working on right now?